Before preserving vegetables, invest in a pressure canner
It’s time to add a new piece of equipment to the canning pantry.
Putting vegetables into canning jars takes more than just a bath in boiling water. Jars must reach a temperature of 240 to 250 degrees, which kills botulism bacteria in low-acid foods. A pressure canner is the only way to reach that temperature in home kitchens.
Canning vegetables, meats, poultry, seafood, beans and any mixes that contain them all require a pressure canner. These low-acid foods have a pH higher than 4.6.
A pressure canner is a pot with a rack in the bottom, a tight-fitting lid and a gauge to control the pressure inside. The canner is different from a pressure cooker, which is used by home cooks to quickly cook sauces under pressure. Pressure cookers or saucepans, generally sold in 4-, 8- and 10-quart sizes, should not be used for pressure canning.
If the mere mention of a pressure canner brings to mind horror stories about explosions, you might be relieved to hear that they’ve been extensively redesigned in recent years.
Before the 1970s, pressure canners were heavy kettles with clamp-on or turn-on lids. New pressure canners are more lightweight, thin-walled kettles and most have turn-on lids. They include a removable jar rack, gasket, vent port, dial or weighted gauge and a safety fuse.
Look for canners with Underwriter’s Laboratory (UL) approval, such as Mirro or Presto brands.
Pressure canners are sold in several sizes (from 17 to 21 quarts) and start at $80, depending on where you buy. Most canners are deep enough for a layer of quart or smaller-size jars, or two layers of pint or smaller-size jars.
There are two types of pressure canners: weighted gauge and dial gauge.
The weighted gauge is a small weight (usually round or disc shaped) that is placed on the vent port to control the pressure inside. The canners vent air and steam during processing to maintain internal pressure, which causes the weight to rock or jiggle. The sound of the rocking or jiggling indicates it is maintaining the proper internal temperature.
According to the Pacific Northwest Extension Publication “Using and Caring for Your Pressure Canner,” the single disadvantage of the weighted gauge canner is that it doesn’t correct precisely for higher altitudes. It must be operated at pressures of 5, 10 or 15 pounds.
Dial gauge canners have a dial attached to the cover, and a needle points to the level of pressure inside. Adjustments for altitude can be more finely tuned.
Dial gauges must be tested before using them and checked for accuracy once a year. Check with your local extension office for information about testing. Most offices will test the dial gauge for a small fee if you drop the lid off at the office.
Unfortunately, the WSU extension service does not test canners in Spokane. House of Hose, 5520 E. Sprague Ave., is the place to have them tested.
The gauges should be replaced if they read high by more than two pounds at 5, 10 or 15 pounds of pressure.
Handle the lid and gaskets on both types of canners carefully and clean according to manufacturer’s instructions. Nicked or dried out gaskets should be replaced.
For more information about pressure canners contact your local extension office for “Using and Caring for Your Pressure Canner.” It will cost $1.50. The booklet can also be downloaded free at http://cru84.cahe.wsu.edu/cgi-bin/pubs/PNW0421.html/
Charts for processing times can be found in the Pacific Northwest Extension publication ” Canning Vegetables” at local extension offices for $1. Extension offices also have publications to guide canning seafood, smoked fish, and meat, poultry and game.
Cookbooks with trusted information include “So Easy to Preserve” by the University of Georgia Cooperative Extension, Ball Blue books and “Ball Complete Book of Home Preserving.”
Online, information can be found at www.uga.edu/nchfp.
Here are some tips for canning safe, high-quality vegetables and other low-acid foods:
Follow the directions exactly. Botulism is rare, but it is deadly or debilitating. Outbreaks of botulism are often traced to home-canned foods.
Low-acid foods are a particular risk because they must be heated to such a high temperature to destroy the botulism spores. Foods naturally high in acid, or those with added acid, prevent botulism growth. Fish, green beans, corn, beets, spinach, asparagus and chili peppers are the most common foods involved in botulism outbreaks. Another recent case involved homemade pickled eggs.
Many people argue that they have been canning things the same way for years, and never been sickened by botulism. But, if you’re not following updated, research-based advice or recipes from the USDA or extension services, it’s gambling with a deadly nerve toxin that causes respiratory failure and possibly death.
As extra insurance against the toxin, Washington State University extension service recommends boiling low-acid foods in a covered saucepan after opening the jars for 10 minutes (adding a minute for each 1,000 feet of elevation above sea level) before serving. It takes 240 degrees to kill botulism spores when canning, but if the toxin forms in canning jars it is killed at 212 degrees (boiling).
Washington soil is high in botulism bacteria, and any food grown in soil is at risk for contamination.
Can vegetables at the peak of quality. Pick tender, young vegetables and purchase only as much as you can process in 2 or 3 hours. Wash under running water or lift in and out of several changes of water. Do not soak.
How much produce do I need? Here are some general guidelines for the amount of fresh vegetables you’ll need per quart:
Asparagus – 2 1/2-4 1/2 pounds
Beans, green, wax or snap – 1 1/2-2 1/2
Beans, lima – 3-5 pounds
Beets, without tops – 2-3 1/2 pounds
Carrots, without tops – 2-3 pounds
Corn, cream-style or whole kernel – 3-6 pounds
Peas, green – 3-6 pounds
Spinach, other greens – 2-3 pounds
Packing the jars. Follow recipe directions for either hot pack or raw packing the vegetables. Hot pack means the vegetables are blanched briefly by steaming or boiling and then packed into jars hot.
In the raw pack method, raw vegetables are packed into jars and then covered with boiling water.
There are advantages to hot packing: It removes air from the vegetables and makes them smaller so more food can be packed into jars. Also, the food is cleansed because the blanching water can be thrown away when it gets gritty or dark.
Follow the instructions exactly because heat may not reach the center of food in jars that have been too tightly packed.
Leave some headspace. Leave one inch of headspace in all jars, except fresh lima beans which require a bit more space. Fill the jars too full and they may not seal, or it could result in liquid loss during processing.
Vent the canner. All pressure canners (even self-venting canners) must be vented for 10 minutes before pressurizing and processing. Venting ensures that the canner is filled with steam and doesn’t have hot and cold spots. Details about how to vent a canner are in the processing steps below.
Adjust for altitude. To make altitude adjustments in a pressure canner, the weight must be adjusted at higher altitudes.
In a weighted gauge canner, use a 10-pound weight for altitudes from sea level to 1,000 feet. Above 1,000 feet use a 15-pound weight.
For dial gauge pressure canners, use 11 pounds pressure on the dial for elevations between sea level and 2,000 feet. For 2,001 to 4,000 feet, 12 pounds of pressure should be used. For 4,001 to 6,000 feet, use 13 pounds pressure, and at 6,001 to 8,000 feet, use 14 pounds pressure.
Salt to taste. Salt is added to vegetables for flavor, not to preserve them. It may be omitted safely. In general, if you use salt add 1/2 teaspoon to each pint jar, 1 teaspoon for each quart.
Don’t force cool the canner. When the timed processing is finished, turn off the heat, remove the canner from the burner and let it depressurize as it cools to room temperature. The cool down time is an essential part of processing and force cooling the canner (by running it under cool water, laying wet towels over it, or opening the vent port) will result in underprocessed food. It could also make liquid spurt from the jars inside or make the jar seals fail. It could also warp the canner lid, ruining it and causing steam leaks.
Carefully dispose of spoiled or underprocessed foods. Unless you know how a product was canned, there’s no way to tell if the food is safe. Even if the jar has sealed, it doesn’t necessarily mean it was canned properly.
There are obvious signs that it has spoiled: a bulging lid, cloudy liquid, off-odor, mushy food, mold growth or other unusual signs. Don’t taste or serve questionable food.
High-acid foods, such as fruit or jams, can be flushed down the toilet or rinsed down the garbage disposal with lots of water. Spoiled low-acid foods, including tomatoes, should be handled as if they contain the botulism toxin, as described below. (This includes any vegetables that were processed in a boiling water bath, instead of a pressure canner.)
Specific instructions for canning tomatoes and salsa will be in a story planned for the Food section on Aug. 27.
Underprocessed food is more dangerous than food that was never heated. Botulism toxin forms when the bacteria are stressed, such as when it is heated but the temperature isn’t hot enough to kill the spores.
If the jars are still sealed, put them in a heavy garbage bag. Mark the bag “Poison – Do Not Eat” and throw in the trash or take it to the landfill.
Unsealed, open or leaking jars must be detoxified before disposal. To do so: Put the jars or cans in a 8-quart or larger stockpot, pan or boiling water canner. Add lids to the pot if they were removed. Wash your hands.
Carefully add water to the pot to cover the jars with at least 1 inch of water. Place a lid on the pot and bring water to a boil. Boil 30 minutes. Cool and discard the jars or cans, lids and food in the trash or bury it in soil.
Then, scrub the counters, containers and equipment that contacted the food. Wrap sponges or washcloths used during cleanup in a plastic bag and throw in the trash.
The steps
1. Read recipe instructions and gather and wash all the equipment, including jars, before getting out your produce. Check jars for any nicks, cracks or rough edges that could prevent them from sealing. Canning jars should be washed in hot, soapy water, rinsed and kept hot. Heat lids according to manufacturers instructions.
2. Prepare food according to recipe instructions and pack into jars, leaving the recommended head space. Use the bubble wand to free any trapped air.
3. Wipe the rims of the jars with a clean, damp cloth and use the lid wand to place lids on the jars. Put on the screw bands and tighten until fingertip tight. Do not use jar tighteners or more force, or it could cause the lids to buckle.
4. Center canner over the burner. When jars of food are ready for canning, put the rack and 2 to 3 inches of hot water into the canner. For hot packed foods, bring the water to 180 degrees ahead of time. Be careful not to boil water or heat it long enough that evaporation decreases the depth.
5. Place prepared jars on the jar rack in the canner, using a jar lifter. Keep jars upright at all times. Tilting the jar could cause food to spill into the sealing area of the lid.
6. Fasten the canner lid securely. Leave the weight off the vent port or open the petcock.
7. To vent the canner, turn the heat to high. Heat until the water boils and steam flows freely in a funnel shape from the open vent port or petcock. (You should be able to cut the steam with your hand when you draw it through.) Keep the burner on high and let the steam flow (exhaust) continuously for 10 minutes.
8. After venting, place the counterweight or weighted gauge on the vent port, or close the petcock. The canner will pressurize during the next 3 to 5 minutes.
Start timing the process when the pressure reading on the dial gauge indicates that the recommended pressure has been reached, or, for canners without dial gauges, when the weighted gauge begins to jiggle or rock as the manufacturer’s instructions direct.
9. Adjust the heat under the canner to maintain steady pressure at, or slightly above, the gauge pressure recommended in the recipe (adjusted for altitude.) Pressure loss can result in underprocessing and unsafe food. Pressure variations during processing may cause unnecessary liquid losses from jars.
If at any time pressure dips below the recommended amount, bring the canner back to pressure and begin the timing of the process over, from the beginning, to ensure the food is safely canned.
10. When the timed processing is done, turn off the heat, remove the canner from the heat and let the canner cool down naturally. While it is cooling, it is also de-pressurizing. Do not force-cool the canner.
“Depressurization of older canner models without dial gauges should be timed,” expert Elizabeth Andress wrote in “Preserving Food: Using Pressure Canners.”
“Standard size heavy-walled canners require about 30 minutes when loaded with pints and 45 minutes when loaded with quarts. Newer thin-walled canners cool more rapidly and are equipped with vent locks that are designed to open when the pressure is gone. These canners are depressurized when the piston in the vent lock drops to a normal position. Some of these locks are hidden in handles and cannot be seen; however, the lid will not turn open until the lock is released.”
After the canner is depressurized, remove the weight from the vent port or open the petcock. Wait 2 minutes (as a safety precaution), unfasten the lid and remove it carefully. Lift the lid with the underside away from you so the steam coming out of the canner does not burn your face.
11. Remove the jars one at a time, using a jar lifter, being careful not to tilt them. Place them on a towel or cooling rack, leaving at least one inch of space between the jars. Avoid placing the jars on a cold surface or in a cold draft.
Let the jars sit undisturbed for 12 to 24 hours. Do not tighten ring bands on the lids or push down on metal lid until the jars are completely cooled.
12. Remove ring bands from sealed jars. Put any unsealed jars in the refrigerator and use first.
13. Wash jars and lids to remove all residues. Then, label and store in a cool, dry place out of direct light.
14. Dry the canner, lid and gasket. Take off removable petcocks and safety valves; wash and dry thoroughly.
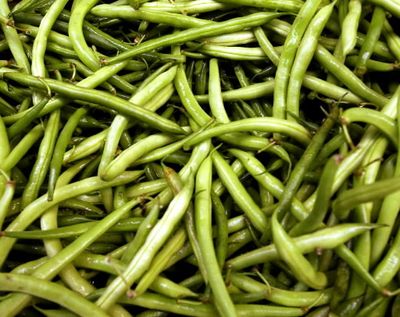
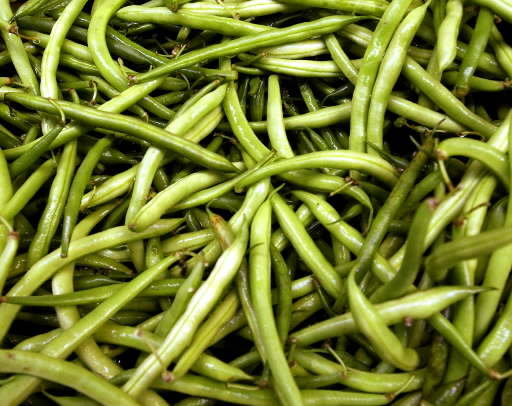
GREEN BEANS
Use these recommendations for snap, Italian, green and wax beans. From the National Center for Home Food Preservation.
9 pounds beans (see note)
Canning salt, if desired
Remove and discard any diseased or rusty pods. Wash beans and trim ends. Leave whole or snap or cut into 1-inch pieces.
To hot pack the beans, cover with boiling water and boil 5 minutes. Fill jars loosely, leaving 1-inch headspace.
To raw pack the beans, fill jars tightly with raw beans leaving 1 inch headspace. Add 1 teaspoon canning salt per quart to the jar, if desired. Adjust lids and process in a pressure canner.
In a dial gauge pressure canner: Process raw and hot packed pints for 20 minutes and quarts for 25 minutes. For both pints and quarts, use 11 pounds pressure for elevations from sea level to 2,000 feet. For altitudes of 2,001 to 4,000 feet, process at 12 pounds. At 4,001 to 6,000 feet, use 13 pounds pressure. Increase to 14 pounds pressure for elevations between 6,001 and 8,000 feet.
In a weighted gauge pressure canner: Process raw and hot packed pints for 20 minutes and quarts for 25 minutes. For both pints and quarts use 10 pounds pressure for altitudes from sea level to 1,000 feet. Above 1,000 feet, use 15 pounds pressure.
Note: An average of 14 pounds of beans is needed for a canner load of 7 quarts. A bushel weighs 30 pounds and yields 12 to 20 quarts, an average of 2 pounds per quart.
Yield: 9 pints
Approximate nutrition per 4-ounce serving: 35 calories, no fat, 2 grams protein, 8 grams carbohydrate, no cholesterol, 4 grams dietary fiber, 297 milligrams sodium.
WHOLE KERNEL CORN
From the National Center for Home Food Preservation
20 pounds sweet corn, in husk (see note)
Canning salt, if desired
Select ears of sweet corn containing slightly immature kernels of ideal quality for eating fresh. Canning of some sweeter varieties or too immature kernels may cause browning. Can a small amount, check color and flavor before canning large quantities.
Husk corn, remove silk, and wash. Blanch 3 minutes in boiling water. Cut corn from cob at about 3/4 the depth of kernel. Caution: Do not scrape cob.
To hot pack the corn: To each clean quart of kernels in a saucepan, add 1 cup of hot water, heat to boiling and simmer 5 minutes. Add 1 teaspoon of salt per quart to the jar, if desired. Fill jars with corn and cooking liquid, leaving 1-inch headspace.
To raw pack: Fill jars with raw kernels, leaving 1-inch headspace. Do not shake or press down. Add 1 teaspoon of salt per quart to the jar, if desired. Add fresh boiling water, leaving 1-inch headspace.
Adjust lids and process in a pressure canner.
In a dial gauge pressure canner: Process hot and raw pack pints for 55 minutes and quarts for 85 minutes. For elevations of sea level to 2,000 feet use 11 pounds pressure for both pints and quarts. Elevations between 2,001 and 4,000 feet should be processed with 12 pounds pressure. From 4,001 to 6,000 feet, 13 pounds pressure should be used. At 6,001 to 8,000 feet, 14 pounds of pressure should be used.
In a weighted gauge canner: Process hot and raw pack pints for 55 minutes and quarts for 85 minutes. For elevations at sea level up to 1,000 feet use 10 pounds pressure. Above 1,000 feet, 15 pounds pressure should be used.
Note: An average of 31 1/2 pounds (in husk) of sweet corn is needed per canner load of 7 quarts; an average of 20 pounds is needed per canner load of 9 pints. A bushel weighs 35 pounds and yields 6 to 11 quarts – an average of 4 1/2 pounds per quart.
Yield: 9 pints
Approximate nutrition per 2-ounce serving: 64 calories, less than 1 gram fat, 2 grams protein, 15 grams carbohydrate, no cholesterol, 2 grams dietary fiber, 293 milligrams sodium.
MIXED VEGETABLES
From ” Canning Vegetables,” a Pacific Northwest Extension publication
6 cups sliced carrots
6 cups cut, whole kernel corn
6 cups cut green beans
6 cups shelled lima beans
4 cups whole or crushed tomatoes
4 cups diced zucchini
Wash, trim and prepare vegetables. Combine all vegetables and add enough water to cover. Boil 5 minutes. Fill jars with hot vegetables and liquid. Add salt if desired. Process at 10 pounds pressure in a weighted gauge canner or 11 pounds pressure for dial gauge canners. Adjust for altitude if necessary, see note below.
Note: You may change the suggested proportions of vegetables or substitute other vegetables. Do not use leafy greens, dried beans, cream-style corn, winter squash or sweet potatoes in the mixed vegetables.
To adjust for altitude: In a weighted gauge canner use a 10-pound weight for altitudes from sea level to 1,000 feet. Above 1,000 feet use a 15-pound weight.
For dial-gauge pressure canners, use 11 pounds pressure on the dial for elevations between sea level and 2,000 feet. For 2,001 to 4,000 feet, 12 pounds of pressure should be used. For 4,001 to 6,000 feet, 13 pounds pressure and at 6,001 to 8,000 feet, use 14 pounds pressure.
Yield: Varies
Approximate nutrition per 4-ounce serving: 72 calories, less than 1 gram fat, 3 grams protein, 15 grams carbohydrate, no cholesterol, 4 grams dietary fiber, 279 milligrams sodium.
CHILI CON CARNE
From ” Canning Meat, Poultry and Game,” a Pacific Northwest Extension publication
3 cups dried pinto beans or red kidney beans
5 1/2 cups water
5 teaspoons salt, divided
3 pounds ground beef
1 1/2 cups chopped onion
1 cup chopped peppers of your choice (optional)
2 quarts crushed or whole tomatoes
1 teaspoon black pepper
3 to 6 tablespoons chili powder
Wash beans thoroughly and place them in a 3-quart saucepan. Add cold water to a level of 2 to 3 inches above the beans and soak 12 to 18 hours. Drain and discard water.
Combine beans with 5 1/2 cups fresh water and 2 teaspoons salt. Bring to a boil. Reduce heat and simmer 30 minutes. Drain and discard water.
Brown ground beef, chopped onions and peppers, if using, in a skillet. Drain off fat and add 3 teaspoons salt, pepper, chili powder, tomatoes and drained beans.
Simmer 5 minutes. Caution: Do not thicken.
Fill pint jars, leaving 1-inch headspace. Adjust lids and process in a pressure canner.
Process pints in a dial gauge pressure canner for 75 minutes at 11 pounds pressure for altitudes between sea level and 2,000 feet. Increase pressure to 12 pounds for 2,001 to 4,000 feet. Pressure should be 13 pounds for altitudes of 4,001 to 6000 feet and use 14 pounds pressure for altitudes 6,001 to 8,000 feet.
In a weighted gauge canner process hot pints for 75 minutes at 10 pounds pressure for altitudes 1,000 feet and below. Above 1,000 feet pressure should be increased to 15 pounds.
Yield: 9 pints
Approximate nutrition per 8-ounce serving: 241 calories, 9 grams fat (4 grams saturated, 34 percent fat calories), 19 grams protein, 21 grams carbohydrate, 42 milligrams cholesterol, 6 grams dietary fiber, 475 milligrams sodium.