Best home-baked bread begins with fresh ingredients
During these uncertain times, I find myself craving foods that remind me of childhood.
One of my fondest memories is coming home from school and rushing into the kitchen, greeted by the mouthwatering scent of rolls fresh out of the oven. My mom baked them with a sprinkling of dried basil and a little salt. She brushed the tops with leftover coffee, creating golden brown crusts and soft insides, dense enough to hold the rapidly melting butter I slathered on them.
We live in busier times where making bread seems to be a lost art. The simple process of combining flour, yeast, salt and water to produce fresh bread has faded in favor of grocery store loaves with 14 ingredients, some of which I can’t pronounce. With a little practice and a dependable recipe, you can enjoy the satisfaction of healthier, tastier homemade bread.
The basics
The first step in any bread recipe is to mix the ingredients. Combine all of the weighed and measured ingredients and ensure that all of the dry ingredients are evenly wetted. It is important to activate the yeast or starter properly, by dissolving dried yeast in warm water, creaming fresh yeast into scalded milk, or whatever the recipe calls for. Vigorous mixing, by hand or mixer, is necessary for even distribution of the yeast cells.
Next the dough is kneaded to condition the ingredients and expand the network of gluten in the dough. The gluten strands trap tiny gas bubbles in the dough, allowing it to rise.
Kneading can be done manually, or by mixer with a dough hook attachment. When properly kneaded, the dough should feel smooth and elastic.
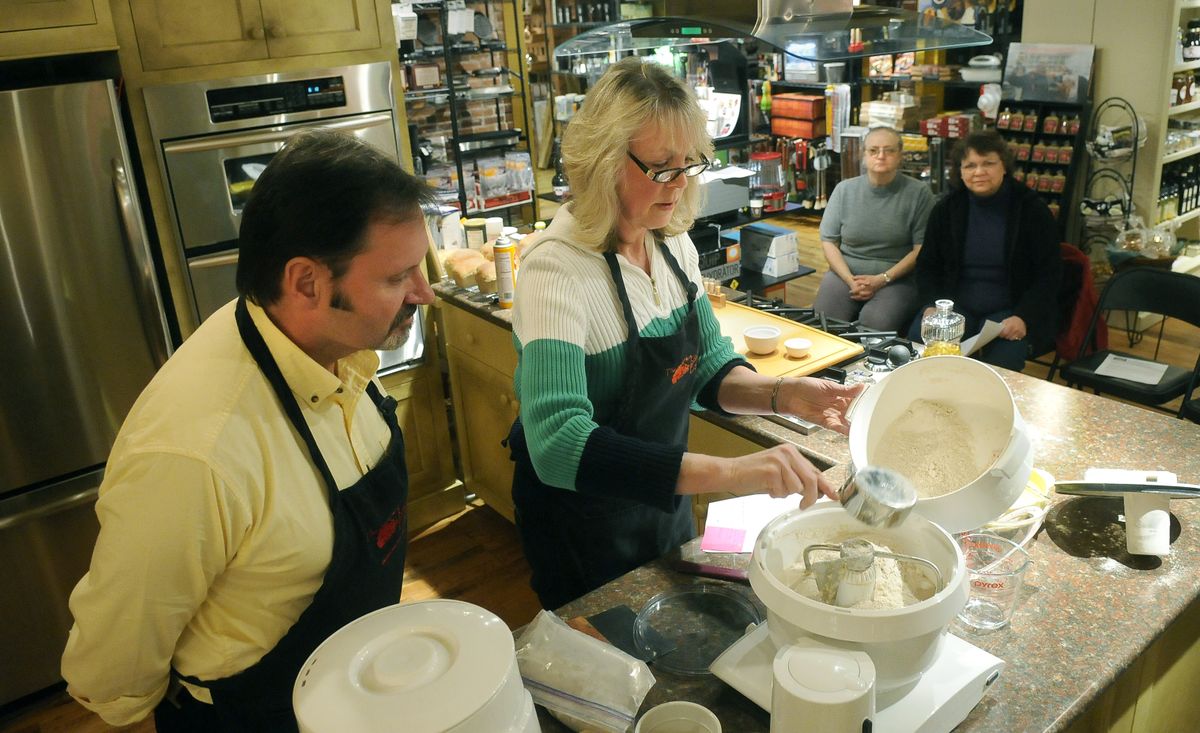
“It should stretch like gum,” says Nicole Frickle, of The Kitchen Engine. In the store’s bread-making class, Frickle encourages students to get the feel of properly kneaded dough by having them touch the dough at various stages. “Students experience for themselves how the dough should feel. It’s fun – we get messy,” she laughs.
After the dough is properly kneaded, it is left to rise. Shape the dough into a smooth ball, place it in a bowl and cover with oiled plastic wrap. As the dough rests, the yeast ferments, releasing carbon dioxide gas. The network of gluten in the dough traps the gas, causing the dough to rise and become light and airy. Some recipes call for vital wheat gluten, a product that enhances the rise and final shape and texture of the bread.
Waiting for the bread to rise can be nerve-wracking for novice bread makers, who fear the yeast won’t work its magic.
“Most students are worried about yeast,” says Char Zyskowski, of Apple Charlotte Cooking Co. “The water shouldn’t be too hot or you’ll kill the yeast. Think ‘baby’s bottle’ for temperature.”
Start early in the day and be patient. If you are having a dinner party, 5 in the afternoon is not the time to start making bread, Zyskowski warns.
While many recipes suggest leaving the dough in a warm place, the dough will eventually rise even in the refrigerator. It will take longer, but that’s OK, Zyskowski says. The longer the dough has to rise, the more the flavor will develop through fermentation.
“Don’t put dough in a warm oven to rise,” she says. “If the oven is too hot, you will kill the yeast.”
Shape the dough after the first rise (or second if the recipe calls for it). Shaping creates a smooth crust, allowing for an even, higher rise during baking. Punch the dough down, and follow the recipe’s instruction for dividing the dough and shaping it into its final form. Don’t use too much flour on your work surface – the dough will be difficult to shape. Excess flour on the outside of the loaf may cause streaks on the crust. Depending on the recipe, the bread may need to rise again after shaping.
Here comes the best part: baking the bread and waiting for the heavenly aroma of fresh-baked bread to fill your kitchen. If you use two racks in your oven, make sure to switch the loaves around during baking to give each loaf adequate heat. When properly baked, the loaves should be evenly brown, sound hollow when gently tapped on the crust, and pull slightly away from the sides of the pan.
Alternative flours
“The most effective grain for bread making is wheat, not only because it tastes good – with a certain nuttiness, no bitterness, and a round, sometimes rich flavor – but because it performs well,” writes Tom Jaine in “Baking Bread at Home.” Wheat contains starch to add body, germ that adds fat, bran for digestion and gluten, which lends elasticity and makes the bread rise.
Jaine recommends rye flour for those wishing to experiment with nonwheat flour. Although low in gluten, rye flour possesses enough gluten to make the bread rise. Most American rye bread recipes call for some wheat flour to make the bread less dense and help it rise.
In “Animal, Vegetable, Miracle,” Steven Hopp suggests finding a basic recipe for a white or whole wheat loaf and making it a few times to get a feel for it. Make sure to start with all fresh ingredients – throw out the old flour and yeast. Once you’ve got the basic recipe, get creative by experimenting with alternative flours such as pumpernickel, spelt, oat, rye, rice and barley. Try less familiar flours such as quinoa, or meals made from ground nuts or seeds, such as almonds or flaxseed.
“Be experimental, but use only a little at first, just 1/4 to 1/3 cup – too much nonwheat flour can compromise the texture and rise of the loaf. Even the failures will be fresh, warm and make the house smell great,” Hopp writes.
The type of wheat used in the bread makes a huge difference. The Kitchen Engine’s Vicky Frickle finds Wheat Montana Prairie Gold white wheat is the best for a uniform loaf that makes perfect sandwiches. You can buy wheat in the bulk bins at some grocery stores but they tend to only have the hard red winter wheat, which produces a much darker, heavier bread, Frickle says.
Fresh ingredients
Wishful Kneads Cooking School in Coeur d’Alene carries everything you’ll need to get started. The school mills Wheat Montana flour fresh every day and sells the wheat berries if you choose to grind your own. Yeast, vital wheat gluten, dough enhancers, plastic bread bags, grain mills, mixers and bread pans are just a few of its offerings. It also sells whole grains such as quinoa, amaranth, rye, oats, barley and others.
Great Harvest, (509) 535-1146, sells freshly milled whole wheat flour. Fresh Abundance, (509) 533-2724, carries several local flours, including organic whole wheat, spelt and rye. Lorien’s Herbs and Natural Foods, (509) 456-0702, is a good source for organic and specialty flours as well.
The Kitchen Engine sells bread-making supplies, Bosch mixers and grain mills. Nicole Frickle and her mother-in-law, Vicky Frickle, are experienced bread makers, and are encouraging of those wishing to learn.
Using a bread machine
If you are pressed for time, you might want to consider baking with a bread machine. Spokane home bakers Gary and Stephanie Plowman have been making bread in their Oster bread machine for 10 years. The Plowmans stocked up on wheat last summer, buying a 50-pound bag of Organic Red Winter Wheat Berries at Bob’s Red Mill in Portland. They like making their own bread because it’s healthier.
“We know what’s in it. We grind our own flour, there are no preservatives, and we use honey from Gary’s dad’s bee farm,” Stephanie Plowman says.
If you are thinking about buying a bread machine, first read “The Bread Machine Magic Book of Helpful Hints,” by Linda Rehberg and Lois Conway, available through the Spokane County Library system. The book discusses the dozens of features available in bread machines, gives troubleshooting advice and contains 55 bread machine recipes.
Roll up your sleeves and get started with these recipes:
The Kitchen Engine’s 100 Percent Whole Wheat Bread
Courtesy of Vicky Frickle, The Kitchen Engine. “Your imagination is the only limitation as to what you can do with this basic recipe,” Frickle says.
2 ¾ to 3 cups hot tap water (hot to the touch, not hot enough to burn finger)
1/4 cup vegetable oil
1/4 cup honey
1 ½ tablespoons dough enhancer
1 ½ tablespoons vital wheat gluten
1 ½ tablespoons instant yeast, preferably SAF brand (available at kitchen stores and Super One grocery store)
3/4 teaspoon salt
7 to 8 cups freshly milled whole wheat flour
Pour water into mixing bowl of electric mixer (see note). Add approximately 3 1/2 cups flour on top of water. Then add oil, honey, dough enhancer, gluten and yeast. Jog mixer on and off to gradually incorporate, ingredients and to mix well, about 1 to 2 minutes.
Add approximately 3 1/2 additional cups of flour and salt. Do not add salt directly to the yeast. Turn mixer to speed 2. Continue adding flour 1/4 cup at a time until the dough pulls away cleanly from the sides of the bowl. Continue kneading on speed 2 for another 5 minutes. Shut machine off and let dough rest for 10 minutes then turn to speed 2 and knead for 1 to 2 minutes more.
Oil or grease hands and counter. Divide dough into equal portions and shape into loaves. Put into well-greased pans. Let rise until double in size. Bake at 350 degrees for 25 to 30 minutes or until golden brown on top. Remove from pans and cool on wire rack. Top of loaves can be rubbed with water or butter for shiny appearance.
Note: Any mixer strong enough to handle dough will work. To make by hand, mix all ingredients with a spoon. When dough gets too stiff, turn it out onto floured work surface and continue adding flour until dough doesn’t stick to your hands. Knead for 10 to 15 minutes until dough is smooth and elastic.
Yield: 2 loaves
These variations start with The Kitchen Engine’s 100 Percent Whole Wheat Bread dough recipe. Make one batch of bread dough and follow the recipes.
Monkey Bread
Pull off small pieces of dough about the size of a golf ball. Roll into a ball. First roll in melted butter or margarine and then roll in mixture of 1 cup sugar and 2 teaspoons cinnamon. Layer the balls in loaf or bundt pan. Let rise until double in size. Bake at 350 degrees for 25 to 30 minutes. When done, invert pan onto a plate. Pull apart to eat.
Breadsticks
Roll dough into finger-thin ropes and cut into desired lengths. Brush with melted butter. Sprinkle with sesame seeds, Parmesan cheese, or some of The Kitchen Engine’s naturally flavored sea salt such as Roasted Garlic, Thai Ginger or Black Truffle. Place on greased baking sheet. Let rise 10 to 15 minutes. Bake at 350 degree for 15 to 18 minutes.
Pizza Rolls
Roll the dough out in a rectangle and spread with pizza sauce, pepperoni and cheese. Roll up cinnamon roll style, cut into 1 1/2 inch slices and put on baking sheet. Let rise until doubled and bake at 350 degrees until golden brown.
Plowman’s Wheat Bread for the Bread Machine
Courtesy of Stephanie and Gary Plowman, Spokane
1/3 cup canola oil
11 ounces water
1 3/4 teaspoon salt
1/3 cup honey
1/3 cup molasses
3 cups whole wheat flour
1 cup white flour
3 tablespoons vital wheat gluten
1 packet active dry yeast
Be sure to put ingredients in this order into the bread machine. Stir the salt in the water with a spoon to make sure that it does not clump up in one spot.
Yield: One loaf
Pita Bread
From “Baking Bread at Home,” by Tom Jaine. After the pitas have cooled slightly, cut them in half and fill with hummus and fresh vegetables or your favorite sandwich fixings.
1 cake of fresh yeast (see note for using instant yeast)
1 cup tepid water, about 70 degrees
3 1/2 cups (400 grams) unbleached white flour
2 teaspoons salt
1 tablespoon olive oil
Dissolve yeast in water in a large bowl. Mix the flour and salt and add them gradually to the liquid, beating vigorously. Mix the dough energetically for 8 to 10 minutes to condition it. Add the olive oil and mix once more. Turn the dough out onto a floured surface and knead for 5 minutes.
Let the dough rise in a bowl, covered with oiled plastic wrap, for about 1 1/2 hours, until doubled in size. Turn onto a well-floured work surface. Divide the dough into 8 pieces and form them into balls. Let them rest for 5 minutes, then roll into flat ovals about 1/4 inch thick. Let them rise in a warm place, between two floured dish towels for about 20 minutes. Meanwhile, heat the oven to 450 degrees and warm one or two greased baking sheets.
Slip the breads onto the baking sheets and bake for about 6 minutes. They should not color. More than one baking sheet may be used at a time, but the heat needs to be intense enough to cause the dough to puff up (the result of steam forcing the two halves of the bread apart). Cool briefly on wire racks, then wrap the bread in dish towels to keep the crusts soft. Eat warm.
Note: If you substitute dried yeast, use two packets and dissolve in warmer water, about 110 degrees.
Yield: 8 pita breads.