Paper Flower Garland: Weekend Project #20
I finally designed a garland that I love for the wedding! It met my criteria of being simple, pretty, and quick to make. This week a few friends came over to help my fiancé and me make nearly 35 feet of garland (that should be plenty, right?). At the wedding, it will be paired with some loosely twisted tulle to spice up the cake and head tables.
You can easily make the same garland in your favorite colors and use it around a girl’s room, to brighten your mantle in the summer, or spice up the living room for a party.
You will need:
- Card stock in your favorite colors—scraps work well for this
- Large flower paper punch
- 1/16” hole punch
- 26 gauge wire in approximately 4-foot lengths
- glass beads
- A nail or small chopstick
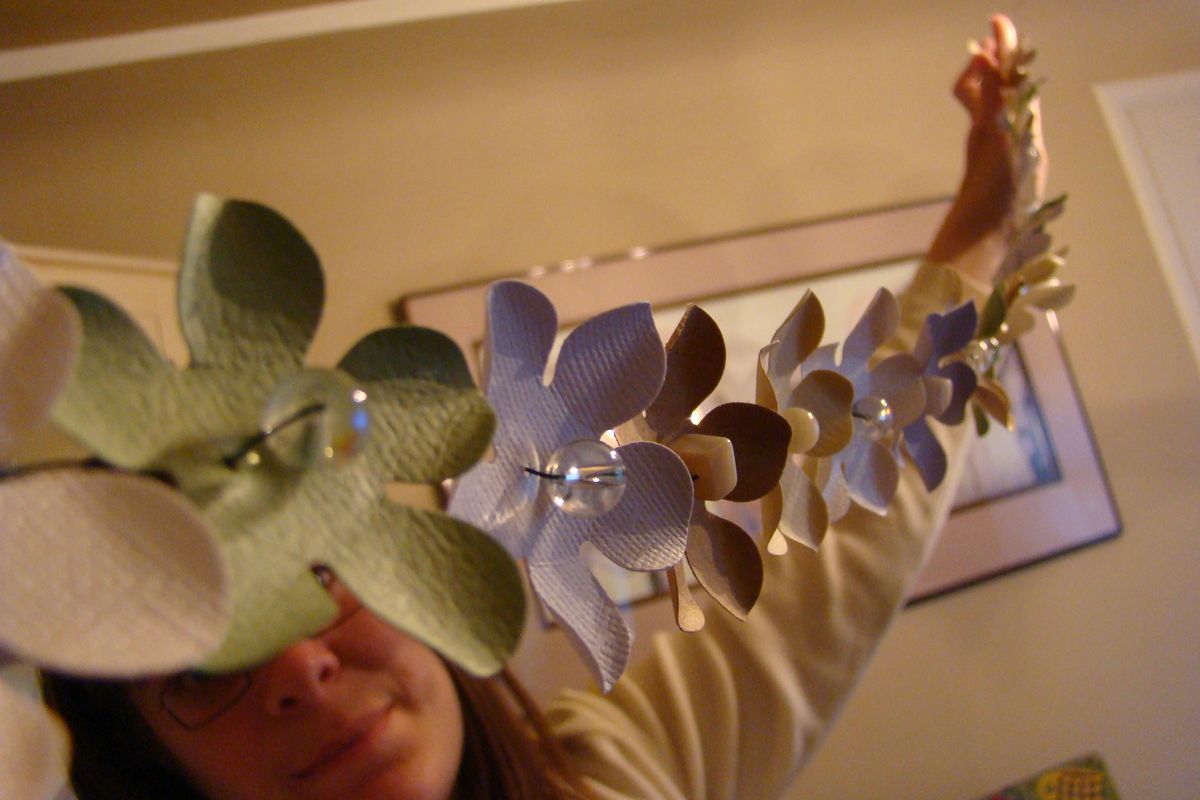
- Punch a bunch of flowers out of your card stock. The amount will depend on how much garland you need.
- Punch two 1/16” holes in the center of each, with about a bead's worth of space between them (see photo tutorial).
- The life of the flower comes in bending and curling the petals. With your fingers, bend each petal forward slightly. Then, using a chopstick (or a long nail, which is what I did), curl the edges of each petal in toward the center. This might feel awkward at first, but you’ll get used to it quickly.
- Now for the construction: you’re going to thread the flowers and beads onto the wire—this keeps the flowers in place and will allow you to bend or shape the garland to your liking. Wire also prevents the flowers from twisting backwards. Start in the middle of your wire. Thread the wire through one of the flower’s center holes and then through a bead. Slide the flower and bead on the wire where you’d like it end up. Hold it in place while you thread the end of the wire through the other hole in the center of the flower. It should now stay in place on the wire. Keep threading flowers and beads onto your wire allowing them to overlap slightly. When you have a 3-5” tail of wire at the end, start adding flowers and beads to the other end, again leaving a tail.
- To attach the segments together, twist the wire ends around each other and hang.
You can easily adapt this garland to other motifs (the world of paper punches is vast) and colors.