Getting to the root of failing floor grout
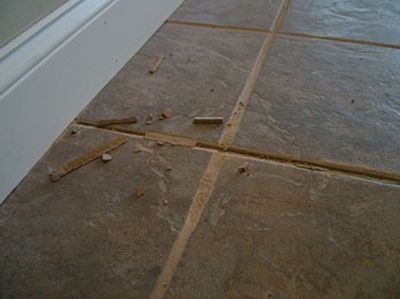
Dear Tim: The grout in one joint of my floor tile has come out. Do you know why this happened? Upon close inspection, I can see that the previous homeowner repaired it. What’s the best way to work with floor grout in this situation? What type of grout do I install, and how do I ensure I match the existing grout color perfectly? – Valerie P., Tampa, Fla.
Dear Valerie: Floor grout can fail for a host of reasons. Some of them have nothing to do with the original installation, and others have everything to do with the installer or bad grout. Let’s just hope that your failure is limited to this one area and that all the remaining grout stays put for quite a while.
Here are but a few reasons why the grout could have failed. I could devote the entire column to just this topic, so I’ll be brief.
First, it could have been a structural failure where the floor moved. Or the culprit may have been seasonal movement of a wood-floor system. The installer might have mixed too much water in with the grout, or used too much water at that spot in the floor when dressing the joint. Or the grout itself could have been bad.
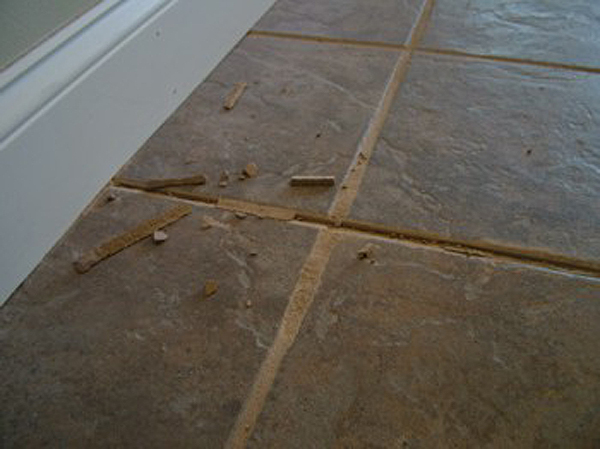
To increase your chances of a repair that lasts, I recommend that you carefully chisel out as much of the grout as possible. Doing this ensures that the good grout you install will not rest on top of poor-quality grout. I liken this to building a house on top of a foundation – you want it to be solid and stable.
You can use a small, motorized rotary tool that has a grinding wheel for this task. You can also do it with a light hammer and a narrow chisel or old worn-out flat-head screwdriver. Always chip away from where the grout is still solid. This puts less stress on the tiles on either side of the grout joint. You have to be really careful that you don’t strike the tile or aim the chipping tool toward the tile.
Vacuum all powdered grout and grout chunks from the joint. Use an old paintbrush to dust out the joint. The bottom of the joint and sides of the tile need to be dust-free to get the best bond between the new grout and the tile.
Matching the grout color is not hard, but many tile installers and homeowners make a mission-critical mistake here. You must restore the existing grout to its original color and allow it to dry before you attempt to select a color.
Remember, there are different shades of white and gray grouts. You can get color charts or sample grout sticks from the specialty tile store. Bring them home and compare them under good light to get a match.
The easiest way I have cleaned floor tile grout is to use oxygen bleach. This nontoxic powder mixes with water to make a solution that attacks all dirt and organic food stains without harming the tile, the grout or the pigments in the grout.
Oxygen bleach has no odor, and if the solution is allowed to sit on the grout for 30 minutes, minimal scrubbing is needed to make the grout look like the day it was installed. You can readily purchase oxygen bleach online.
Visit a store that sells just ceramic tile or tile and stone products; they almost always have a massive selection of grout colors. You will probably be using sanded grout if the joints between your tile are wider than one-eighth of an inch.
Look closely at your existing grout. If it has a rough texture similar to medium-grit sandpaper, you have sanded floor grout.
Mix some new grout, about a cupful, to a consistency that matches thick mashed potatoes. Spread it out on a piece of aluminum foil so it’s one-quarter-inch thick. Allow this to dry naturally in the air for two days.
Crack off small pieces and set them next to the existing grout or in the empty grout joint to see how the color looks. Do this until you get a match. You may have to blend different grouts to get a perfect match.
When you finally have the grout color matched, you can begin to install the new grout. Check again to make sure the joint is dust free. Mix a new batch of grout and get a rubber float ready, as well as a grout sponge and a bucket of warm water.
Push the grout into the joint using the float. Hold the float at a 45-degree angle and wipe away excess grout so the grout is flush with the top of the tile. Don’t worry about a film on top of the tile.
Wait 15 or 20 minutes until the grout in the joint is pretty firm and stiff. Then wet the sponge and squeeze all the water out of it you can. Lightly stroke the sponge over the tile applying minimal pressure. Do this until the film is completely removed from the tile and the grout joint has the same appearance as the existing grout around adjacent tiles.
The new grout will appear darker than the existing grout. Don’t worry about that, as it should dry to the correct color in two or three days.
Check the grout after an hour or two to be sure the film is completely gone from the tile. If needed, wipe with the sponge again, rinsing it frequently. Dry the wet tile with an old rag to polish it and ensure all grout is off the tile.