Yes, we can
Preserving foods can be a lot easier if we all do it together
Maybe you’re trying to save money. Perhaps offering your family wholesome foods you make yourself is a goal. Or, maybe those garden boxes you planted in the backyard are now overflowing with more fruits and vegetables than you can possibly eat.
This time of year, the piles of produce at the farmers’ market or the bounty from even a small garden can inspire even the busiest person to consider canning and preserving. According to a recent news release from Jarden Home Brands, makers of Ball products, sales for its home preserving products have risen 28 percent since this time last year.
For those whose mother or grandmother canned foods every year, the process seems second-nature, even comforting. If not, warnings about botulism can be scary, canning equipment confusing and pH charts, pectin and syrup pack overwhelming. Many people never get beyond the thought of canning.
That’s why we’re launching a series of stories that will help beginners get started canning and give long-time canners a refresher (and maybe a few new recipes).
We’ve compiled expert advice for an overview of canning basics, including: what’s safe, the equipment necessary, and step-by-step instructions for getting a recipe into jars while avoiding any rookie mistakes.
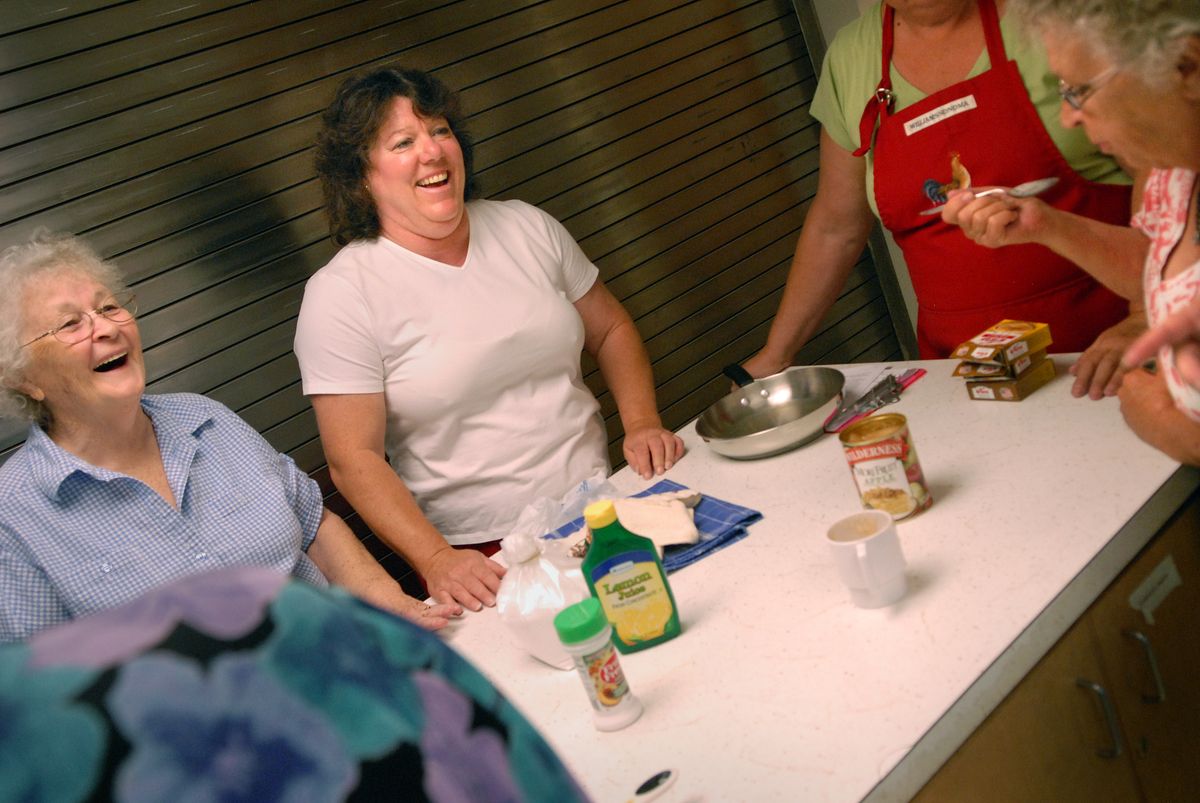
I’ll include the information gathered this spring and early summer at a Master Food Preserver class through Washington State University Extension Service, with instructor Lizann Powers-Hammond.
The extension service offered the class to residents from Spokane and surrounding counties for the first time in about 10 years. Twenty-six people took the class and are now considered by Washington State University extension to be qualified to give advice on preserving and food safety and help people with questions and concerns.
The WSU-Spokane County extension office can be reached at (509) 477-2048 for help with common canning and food safety questions. WSU extension offers a toll-free number (866) 986-4865.
For the next five weeks, we’ll have more details and recipes with stories in the Food section about canning fruits, canning vegetables, jams and jellies, pickles and sauerkraut, and tomatoes and salsas.
Basics
To safely preserve food, the microorganisms that can cause spoilage and illness must be killed. This takes heat.
The amount of heat and the time it takes to kill those little buggers depends on several factors, including: the food being preserved, acidity of the food, temperature and size of the food when it’s packed into jars, size of the jars and altitude at your house.
There are only two safe ways to can foods: in a boiling water bath, or in a pressure canner. Using any other method for sealing jars – steam canning, open kettle canning, vacuum packing, the dishwasher, magic canning powder – is considered unsafe and could put anyone who eats the food at risk for botulism.
There is no regulatory agency that oversees home-canned foods, so there is a lot of misinformation floating around out there in cookbooks and on the Web. Seek out research-based advice taught by university extension agents, information from the National Center for Home Food Preservation and Ball/Kerr. The most recent “Ball Blue Book” and the “Ball Complete Book of Home Preserving” are good resources for information.
Processing times for foods were updated in the late 1980s and early 1990s after new research found some of the times previously followed were inadequate. Don’t rely on canning charts from old cookbooks, Dorothy Dean processing times or other outdated recipes.
Fruits, tomatoes, pickles, sauerkraut, jams and jellies can be processed in a boiling water bath canner. That’s because they have a high enough natural or added acidity to inhibit the growth of bacteria. These acid foods have a pH of 4.6 or lower.
In a water bath, jars of food are covered with boiling water (212 degrees at sea level) and processed for a recommended time. This forces the air out of the jar and forms a vacuum seal as it cools. Because water boils at a lower temperature at higher elevations, the processing time is lengthened for those living at elevations above 1,000 feet.
The elevation at the Spokane International Airport is 2,376 feet above sea level. At Felts Field, the elevation is 1,953 feet. If you don’t know the elevation of your home, call a local county extension agent for help or go to www.earthtools.org.
For elevations between 1,000 and 3,000 feet, add five minutes of processing time to those given in the recipes. For elevations between 3,000 and 6,000 feet add 10 minutes. At 6,000 to 8,000 feet add 15 minutes to the time.
Pressure canning is the only safe method of canning vegetables, meats, poultry and seafood. These low-acid foods don’t have enough acidity to prevent the growth of bacteria.
On a pH chart, low-acid foods have an acidity above 4.6. They must be heated to a higher temperature that can only be achieved in a pressure canner. In a pressure canner, jars are placed in 2 to 3 inches of water, the canner lid is closed and then the canner is heated to a temperature of 240 degrees.
For extra insurance against botulism in low-acid foods, WSU extension recommends boiling them for 10 minutes before serving.
Pressure canners must also be adjusted for altitude starting at 1,000 feet of elevation. Watch for those details in the upcoming story on canning vegetables.
Some foods are borderline on this acidity scale. The most famous is the tomato. Figs are also close to the cutoff. Both can be safely canned in a water bath canner, but extra acid (lemon juice) must be added. We’ll talk about that more in a later story on canning tomatoes and salsa.
Are you still with me? Good. Now is a great time to talk about botulism.
Clostridium botulinum is a bacteria common in the soil (especially in Washington, according to WSU’s Powers-Hammond). Washington and Alaska have higher rates of botulism than other states, according to WSU extension.
When the organism is sealed into canning jars and not processed properly, it can produce a deadly neurotoxin. Botulism can cause respiratory failure and death. Those who survive suffer lifelong debilitating effects.
Past outbreaks have been caused by home-canned food: Fish, green beans, corn, beets, spinach, asparagus and chili peppers have been implicated. A more recent case was caused by homemade pickled eggs.
Botulism is rare. Let’s keep it that way. Carefully follow instructions for canning, especially those for low-acid foods.
Equipment
Let’s start with boiling water canning. I’ll cover pressure canning specifics in an Aug. 6 story on canning vegetables.
Here’s what you’ll need:
Boiling water canner – These are large pots with a rack in the bottom. They must be deep enough to cover pint or quart jars with 1 to 2 inches of water and have enough room to contain briskly boiling water. Most are made of aluminum or porcelain-covered steel.
The canner should have a flat bottom if you are using an electric stove, including smooth top ranges (check your owners manual for more information.) If you have a gas stove, either a flat bottom or ridged bottom pan will work. It should come with a rack to hold the jars off the bottom of the pan and a fitted lid. It should be no more than 4 inches wider in diameter than the burner for safe processing.
Actually any large stock pot can work as a boiling water canner. It just has to be big enough to hold the jars and enough water to cover by 1 to 2 inches. Place a rack inside to hold the jars off the bottom of the pan.
Canners can be found at hardware stores and some cooking stores.
Canning jars, lids and screw bands – Regular Mason jars, with self-sealing lids, are the best choice. They come in half-pint, pint, 1 1/2 pint, quart and half gallon sizes. The standard jars have a mouth opening of 2 3/8 inches; wide-mouth jars have a 3-inch opening and many people find them easier to fill and empty.
The lids come in two pieces: the flat metal lid is held in place by a metal screw band during processing. The flat lid is crimped on the bottom edge to form a trough, which is filled with a gasket compound. When jars are processed, the lid gasket softens and flows slightly to cover the jar-sealing surface, yet allows air to escape from the jar. The gasket then forms an airtight seal as the jar cools.
Gaskets in unused lids are good for about five years. Lids should be used only once.
Funnel or jar filler – It’s not required, but makes it easier to pack food into jars. We cut the bottom out of a plastic drink cup to create one at a recent demonstration of water bath canning.
Jar lifter, tongs and lid wand – Essential for removing hot jars from the canner. Kitchen tongs with silicone tips or metal tongs with rubber bands wrapped around the tips can work in a pinch. A lid wand has a magnet on the end to help remove heated lids and place them onto jars.
Bubble wand, small rubber spatula or chopstick – Used for removing bubbles from the filled jars. Some wands are sold specifically as bubble freers, but any plastic knife, spatula or even a chopstick will work. Don’t use anything metal or it could scratch the glass and make the jar more likely to break during processing.
Clean cloths – Use for wiping jar rims before placing the lids on top.
The steps
1. Gather and wash all the equipment, including jars, before getting out your produce. Check jars for any nicks, cracks or rough edges that could prevent them from sealing. Canning jars should be washed in hot, soapy water, rinsed and kept hot. This can be done in the dishwasher or by placing jars in the water heating in the canner.
Jars that will be processed less than 10 minutes need to be sterilized. Do this by boiling them for 10 minutes plus an additional minute for each 1,000 feet of altitude. Follow the manufacturer’s instructions for heating and holding lids.
2. Fill the canner about halfway with hot water and begin heating it on your stove. You’ll need the water to be 1 to 2 inches above the jars once they are placed in the water. After using it once or twice you’ll get a feel for how much water needs to go into the pot. Start heating a second pan of water in case you need to add more. You should also remove water from the canner if it’s too deep once jars are placed inside.
3. Prepare food according to recipe instructions and pack into jars, leaving the recommended head space. Use the bubble wand to free any trapped air.
4. Wipe the rims of the jars with a clean, damp cloth and use the lid wand to place lids on the jars. Put on the screw bands and tighten until fingertip tight. Do not use jar tighteners or more force, or it could cause the lids to buckle.
5. Load filled jars, fitted with lids, into the canner rack and use the handles to lower the rack into the water; or fill the canner, one jar at a time, with a jar lifter.
6. Add more boiling water, if needed, so the water level is at least 1 inch above jar tops. Or remove water as necessary.
7. Turn heat to high until water boils vigorously.
8. Set a timer for the minutes required for processing the food according to the recipe or chart. Start timing when the water returns to a boil. Be sure to check processing times depending on whether it was a raw pack or hot-packed foods, and the size jars you’re using. Also, don’t forget to adjust for altitude.
9. Cover with the canner lid and lower the heat setting to maintain a gentle boil throughout the process.
10. Add more boiling water, if needed, to keep the water level above the jars.
11. When jars have been boiled for the recommended time, turn off the heat and remove the canner lid. Let jars sit in the water 5 minutes before removing. This helps prevent liquid loss from the jars.
12. Using a jar lifter, remove the jars by lifting straight up and place them on a towel, leaving at least an inch between the jars during cooling. Do not tilt the jars as you remove them. Any water left on top will evaporate during cooling or can be wiped off once the jars are sealed and cooled.
13. Let the jars sit undisturbed for 12 to 24 hours. After that, test to be sure the jars have sealed. They should be curved downward and should not move when pressed with a finger. If the jar has not sealed, it should be reprocessed within 24 hours, refrigerated and used within two or three days, or frozen. Do not open jars to replace any liquid that has been lost. It is safe, just use those jars first.
14. Label jars with contents, date and lot number (if you canned more than one batch that day) and store jars in a clean, cool, dark and dry place, between 50 and 70 degrees. If one of your jars spoils, then you will know which of the other jars were in that load so they can be thrown out. Remove screw bands to prevent them from sticking or rusting. They can be washed, dried and stored for later use.
Ready? Here are a few recipes to get you started:
Vanilla Strawberry Jam
From “Ball Complete Book of Home Preserving”
7 cups granulated sugar
8 cups whole strawberries (approximately)
1/2 vanilla bean, split in half lengthwise
4 tablespoons lemon juice
1 package (1.75 ounces) regular powdered fruit pectin
Place 8 clean 8-ounce Mason jars on a rack in a boiling water canner. Fill the jars and canner with water that reaches the top of the jars. Cover and bring water to a simmer over medium heat. Do not boil.
Prepare 8 lids. Set screw bands aside. Place the lids in a small saucepan and cover with water. Heat just to a simmer over medium heat, but do not boil. Keep the lids warm until ready to use. Do not heat screw bands.
Measure sugar into a bowl and set aside. (Sugar is added to the boiling jam all at once, so measuring it ahead of time prevents errors in quantities and eliminates delays.)
In a colander placed over the sink, wash strawberries in cool running water. Drain thoroughly and, using a strawberry huller or the rounded end of a potato peeler, remove hulls.
In a glass pie plate or flat-bottomed bowl, place a single layer of strawberries. Using a potato masher, crush berries and transfer to a 1-cup liquid measure. As you accumulate each cup, transfer crushed berries to a large, deep stainless steel saucepan. Repeat until you have 5 cups of crushed strawberries.
Add vanilla bean and lemon juice to crushed strawberries in saucepan. Whisk in pectin until dissolved. Bring to a full rolling boil over high heat, stirring frequently. Add sugar all at once and, stirring constantly, return to a full rolling boil that cannot be stirred down. Boil hard, stirring constantly, for 1 minute. Remove from the heat and, using a large slotted metal spoon, skim off foam. Remove vanilla bean.
Fill one jar at a time. Remove jar from canner and empty hot water back into canner. (Do not dry jar). Place jar on a tray or towel-covered counter and place a canning funnel in it. Ladle hot jam into hot jar, leaving 1/4 inch headspace. Slide a nonmetallic utensil, such as a rubber spatula, down between the jam and the inside of the jar two or three times to release air bubbles. Adjust headspace, if necessary, by adding hot jam.
With a clean damp cloth or paper towel, wipe jar rim and threads to remove any food residue. Using a magnetic or nonmetallic utensil, lift hot lid from water and center it on jar. Place screw bands on the jar and with your fingers, screw band down firmly, just until resistance is met, then increase to fingertip-tight. Do not over tighten or use any tools to apply screw band. Return jar to the canner rack and repeat until all jam is used.
When all jars are filled, lower rack into canner and ensure jars are completely covered by at least 1 inch of hot water. Cover canner and bring water to a full rolling boil over high heat. Process for 10 minutes (adjusting for elevation, see note), starting timer only when water reaches a full rolling boil. At the end of the processing time, turn heat off and remove canner lid. Wait 5 minutes, then remove jars, without tilting. Place jars upright no a towel in a draft-free place and let cool, undisturbed for 24 hours.
After 24 hours, check lids for seal. Remove screw bands and press down on the center of each lid with your finger. Sealed lids will be concave (they’ll curve downward) and will show no movement when pressed.
Jars that haven’t sealed properly must be refrigerated immediately or reprocessed. Rinse and dry screw bands. Wipe jars and, if desired, loosely reapply screw bands. Label jars and store in a cool dry place.
Note: For elevations between 1,000 and 3,000 feet, add five minutes of processing time to those given in the recipes. For elevations between 3,000 and 6,000 feet add 10 minutes. At 6,000 to 8,000 feet add 15 minutes to the time.
Variations: For regular strawberry jam omit the vanilla bean.
For Strawberry Balsamic Jam, reduce the lemon juice to 1 tablespoon and add 3 tablespoons good quality balsamic vinegar.
For Lemony Strawberry Jam, add the grated zest of a large lemon to the crushed strawberries.
For Peppered Strawberry Jam, stir 1/2 teaspoon freshly ground black pepper into the cooked jam just before ladling into jars. Be sure to use freshly ground pepper, which delivers a fresher-quality flavor
Yield: 8 (8-ounce) jars
Approximate nutrition per 1-ounce serving: 67 calories, no fat, no protein, 17 grams carbohydrate, no cholesterol, less than 1 gram dietary fiber, less than 1 milligram sodium.
Silky Apricot Butter
From “Ball Complete Book of Home Preserving.” Use this rich butter as a cake filling, dessert topping or condiment.
2 pounds apricots, peeled, halved and pitted (see note)
1/2 cup water
3 cups granulated sugar
2 tablespoons lemon juice
In a large stainless steel saucepan, combine apricots and water. Bring to boil over medium-high heat. Reduce heat and boil gently, stirring occasionally, until the apricots are soft, about 20 minutes.
Working in batches, transfer apricot mixture to a food mill or a food processor fitted with a metal blade and puree just until a uniform texture is achieved. Do not liquefy. Measure 6 cups of apricot puree.
In a clean, large stainless steel saucepan, combine apricot puree and sugar. Stir until sugar dissolves. Bring to a boil over medium-high heat, stirring frequently, until mixture thickens and holds its shape on a spoon. Stir in lemon juice.
Meanwhile, prepare canner, jars and lids.
Ladle hot butter into hot jars, leaving 1/4 inch headspace. Remove air bubbles and adjust headspace, if necessary, by adding hot apricot butter. Wipe rim. Center lid on jar. Screw band down until resistance is met, then increase to fingertip-tight.
Place jars in canner, ensuring they are completely covered with water. Bring to a boil and process for 10 minutes (adjusting for altitude.) Remove canner lid. Wait 5 minutes, then remove jars, cool and store.
Note: This butter can be prepared with unpeeled apricots. It will have a coarser texture but a more robust flavor.
Yield: 6 (8-ounce) jars or 3 pint jars
Approximate nutrition per 1-ounce serving: 50 calories, no fat, less than 1 gram protein, 13 grams carbohydrate, no cholesterol, less than 1 gram dietary fiber, less than 1 milligram sodium.
Apple Pie Filling
From WSU Cooperative Extension
6 quarts blanched, sliced, peeled, cored apples (see note)
5 1/2 cups granulated sugar
1 1/2 cup Clear Jel (see note)
1 tablespoon ground cinnamon
1 teaspoon ground nutmeg (optional)
2 1/2 cups cold water
5 cups apple juice
7 drops yellow food coloring (optional)
3/4 cup lemon juice
Prepare boiling water canner. Heat jars and lids in simmering water until ready for use. Do not boil. Set bands aside.
Use firm, crisp apples; Golden Delicious, Rome and other varieties of similar quality are suitable. If apples lack tartness, use an additional 1/4 cup of lemon juice for every 6 quarts of sliced apples.
Wash, peel and core apples. Cut apples into slices 1/2 inch wide. Place in an anti-darkening solution containing 1 teaspoon of ascorbic acid crystals in 1 gallon of waer. Or, follow the manufacturer’s instructions for Fruit-Fresh or a similar product.
Remove from anti-darkening solution and drain well. To blanch the fruit, place 6 cups at a time in 1 gallon of boiling water. Boil each batch for 1 minute after the water returns to a boil. Remove fruit from blanch water, but keep the hot fruit in a covered boil or pot while the Clear Jel mixture is prepared.
Combine sugar, Clear Jel, cinnamon and nutmeg in a large saucepot with water, apple juice and food coloring (if using). Stir and cook on medium heat until mixture thickens and begins to bubble. Add lemon juice to the boiling mixture and boil 1 minute, stirring constantly Immediately fold in drained apple slices and fill hot jars with hot mixture.
Leave 1-inch headspace. Remove air bubbles. Wipe jar rims. Adjust lids and process immediately in boiling water bath.
Process pints or quarts for 25 minutes for elevations up to 1,000 feet, 30 minutes for elevations 1,001 to 3,000 feet, and 35 minutes for elevations of 3,001 to 6,000 feet.
Remove jars and cool. Check lids for seal after 24 hours.
Note: Clear Jel is a modified food starch that is used for canning. Other starches, such as cornstarch, break down and result in a runny filling. There is no substitute.
Clear Jel is not available in most grocery stores. It can be ordered from Sweet Celebrations at (800) 328-6722, www.sweetc.com or from several other places online.
Yield: 7 quart jars
Approximate nutrition per 4-ounce serving: 128 calories, less than 1 gram fat, less than 1 gram protein, 33 grams carbohydrate, no cholesterol, 1 gram dietary fiber, 1 milligram sodium.