The fruits of summer’s labor
Canning guarantees fresh treats in winter

Pulling back green leaves to find the perfect, plump apricot is my idea of fun. Better yet, I love helping a child reach the sun-kissed fruit high in the tree.
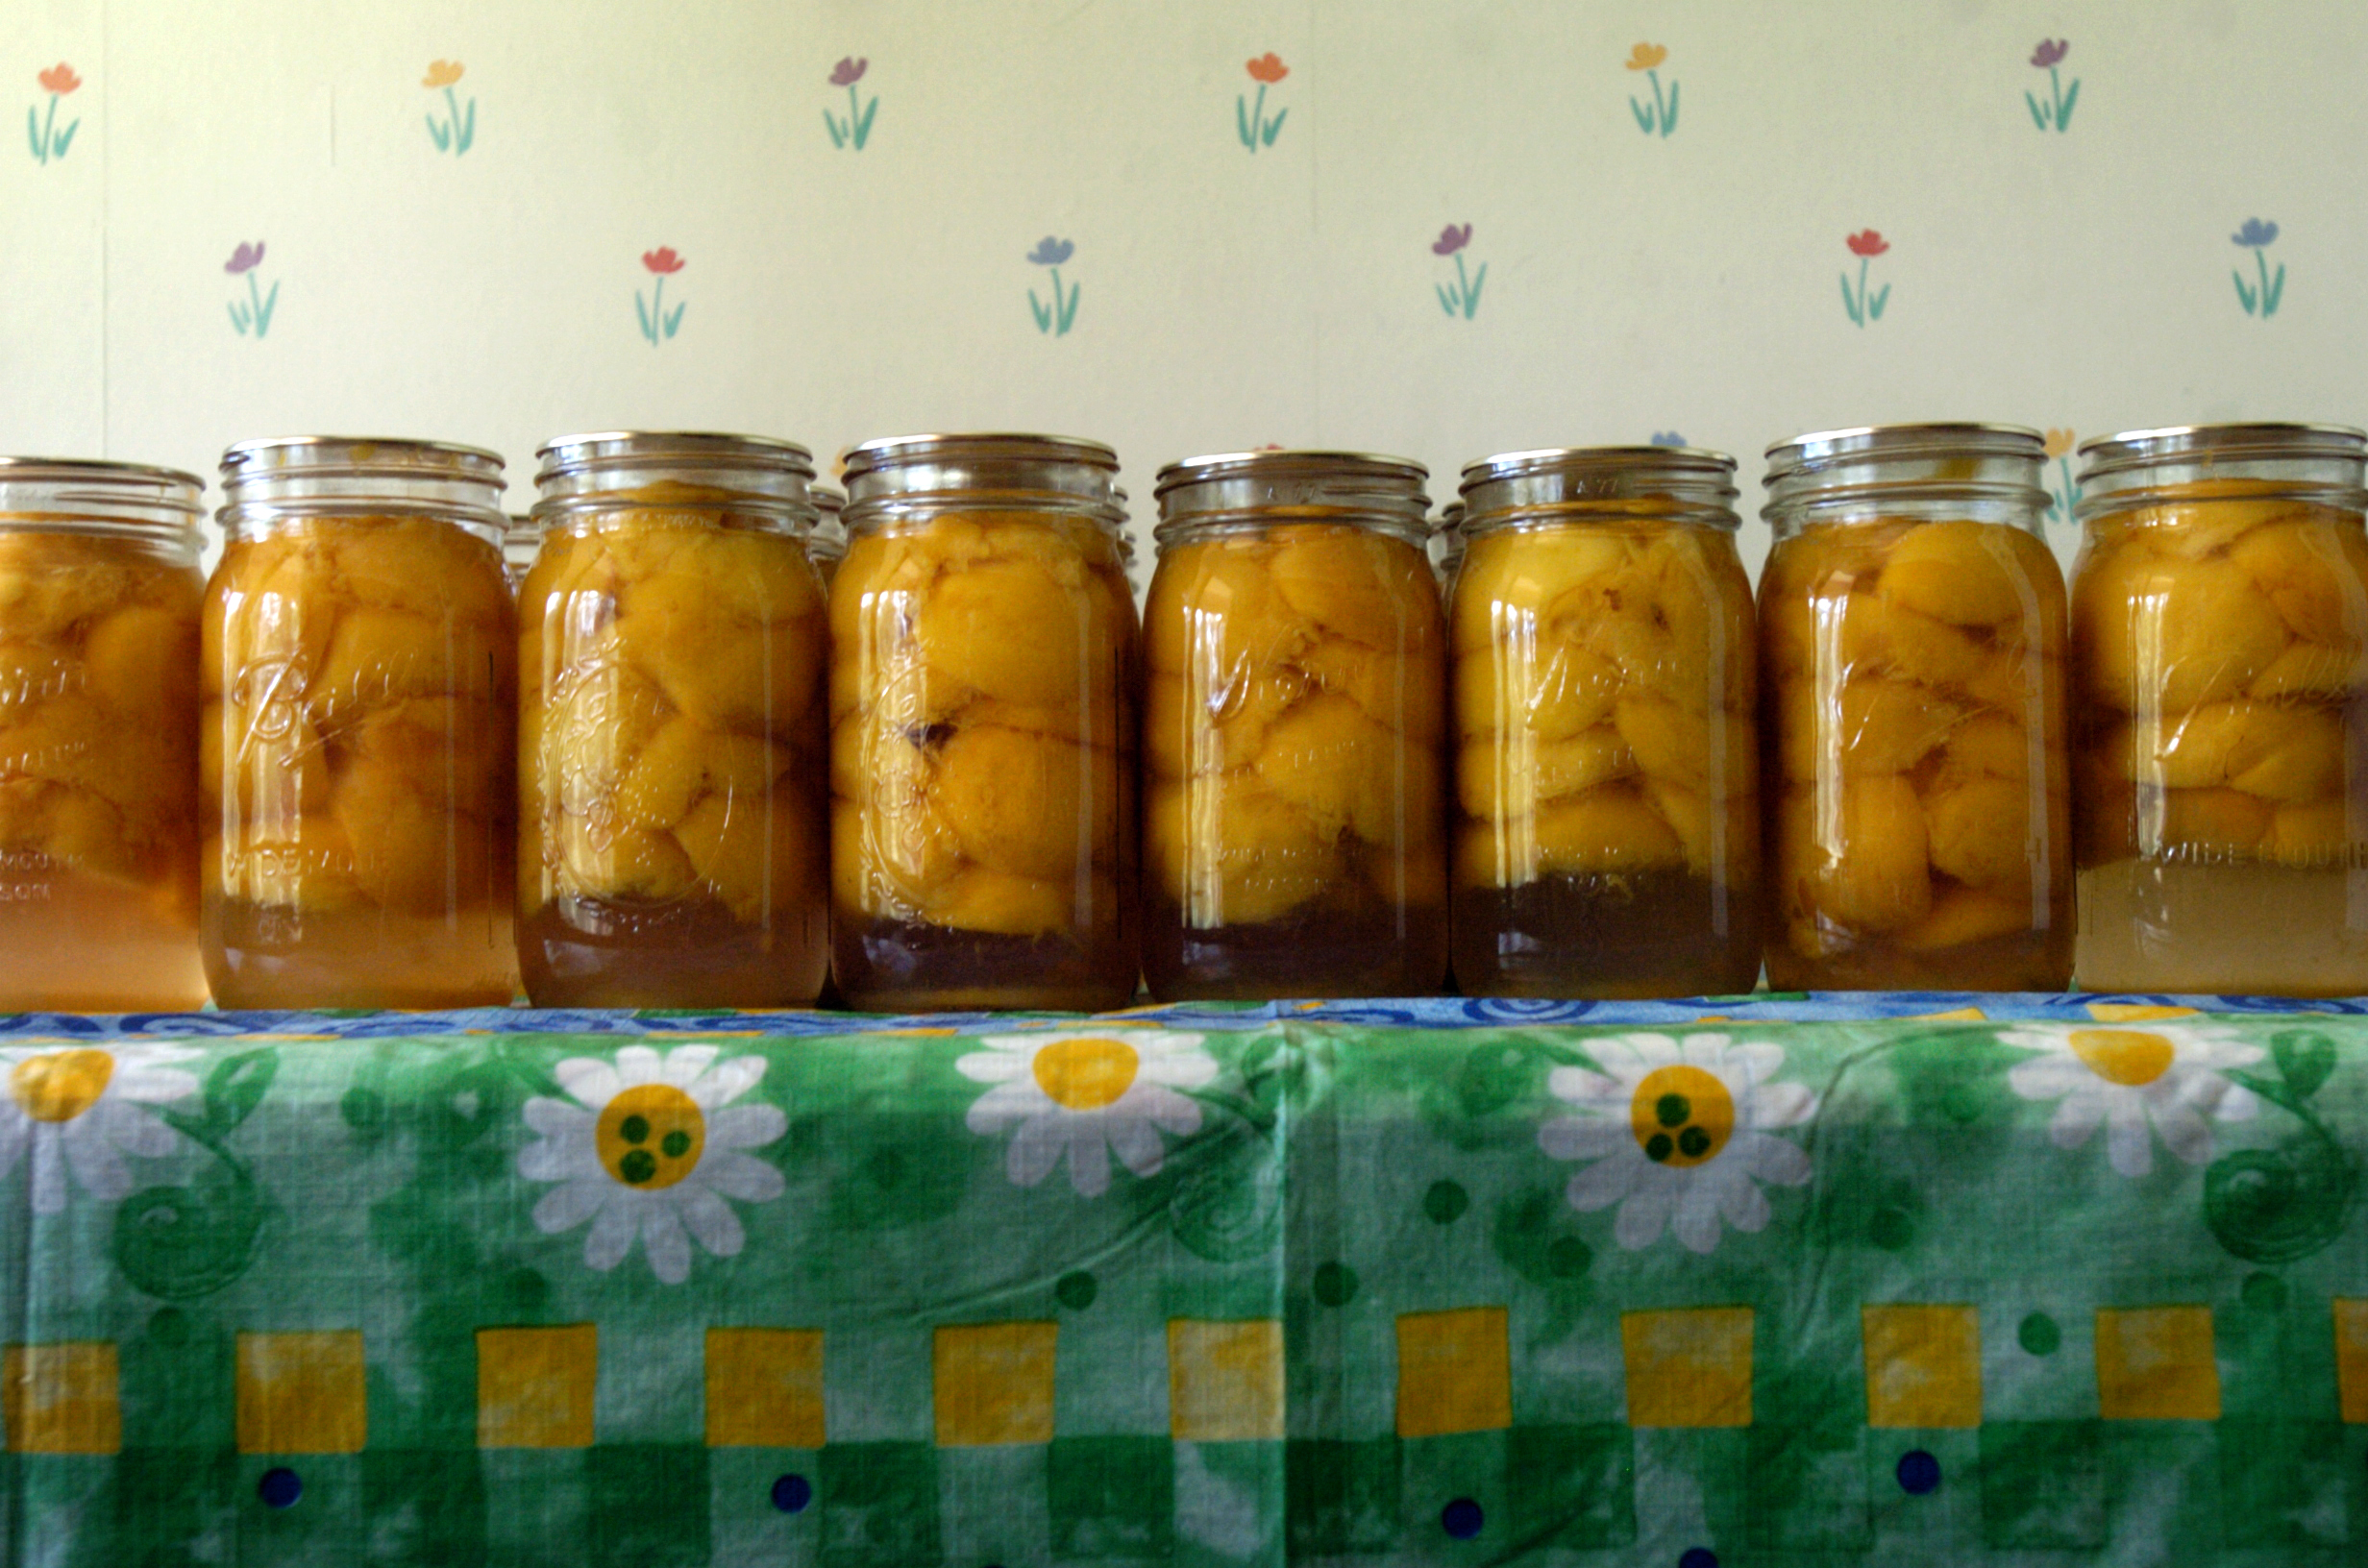
A fitting end to a day of picking is storing the fruit so you can remember summer’s warmth when winter snows linger. There’s just something about the satisfaction of having a line of jars packed full of fruit on the kitchen counter and in the pantry. (Plus, it’s easy to get carried away when you’re picking, and you can only eat so much before it gets overripe and starts to turn.)
The hardest part about canning fruits at their peak is sacrificing part of a perfect summer day to put them in the jar. Heating the already hot kitchen with a giant vat of boiling water is another drawback.
Fruit can be safely canned in a water bath canner. Most fruit naturally has a high enough acidity to prevent bacteria growth, or destroy them more rapidly when heated. A few fruits have a borderline acidity for water bath canning (anything with a pH lower than 4.6 must have acid added or be preserved using a pressure canner). Asian pears and figs are good examples.
Here are some tips that can help you get the best quality canned fruits:
• Can fruits at the peak of quality. For some, this means cleaning and processing immediately after picking. Other fruits have more flavor if they are ripened after harvest, such as apricots, plums, peaches, nectarines and pears.
Throw away any fruit that is moldy, bruised or diseased. Spots can be trimmed from larger pieces of fruit. Canning can only preserve food quality. It’s not going to get better in the jar.
• How much fruit? For beginning canners it can be hard to tell how much fruit is needed. Yield can depend on quality of fruit, ripeness, size and variety, but in general here are some guidelines for amount of fresh fruit needed per quart of canned fruit:
Apples – 2 1/2-3 pounds
Apricots – 2-2 1/2 pounds
Berries – 1 1/2-3 pounds
Cherries – 2-2 1/2 pounds
Peaches – 2-3 pounds
Pears – 1 1/2-3 pounds
Plums – 1 1/2-2 1/2 pounds
• Pick your pack. Fruit can be canned using raw pack or hot pack methods. Raw pack means fruit is packed into jars and covered with boiling water, syrup or juice. In a hot pack, the fruit is boiled in the water, syrup or juice and then packed into jars while still hot.
Both methods are safe; the decision is a quality issue.
Hot packing has advantages. The fruit is easier to pack into the jars, so more can go into each jar. The processing time is often shorter, and light-colored fruits are better protected from darkening. Also, most raw-packed fruit will have a firmer texture.
There is better color retention at first, but it will be worse after three months. Floating fruit is common.
• Sweeten the fruit, or don’t. “Sugar syrup is not necessary for safety,” says Lizann Powers-Hammond, Washington State University Extension food and nutrition educator.
Sugar does not prevent canned fruit from spoiling. It is used for flavor, to retain color and protect texture. Experiment until you find the pack you prefer.
Sugar can be added dry to juicy fruits or as a syrup. In general, add 1/2 cup sugar to each quart of raw, prepared fruit. Heat it slowly to simmering and pack hot into jars with the juice that cooked out.
For raw packing or hot packing fruit that is not very juicy, prepare a syrup, selecting the sweetness you prefer:
Very Light – About 10 percent sugar. Use 1/2 cup sugar per quart liquid.
Light – About 20 percent sugar. Use 1 cup sugar per quart. Use with very sweet fruit.
Medium – About 30 percent sugar. Use 1 3/4 cups sugar per quart. Use for sweet apples, sweet cherries, berries and grapes.
Heavy – About 40 percent sugar. Use 2 3/4 cups sugar per quart. Use with tart apples, apricots, sour cherries, gooseberries, nectarines, pears, peaches and plums.
Very Heavy – About 50 percent sugar. Use 4 cups sugar per quart. Best with very sour fruit.
According to “So Easy To Preserve,” by the Cooperative Extension from the University of Georgia, the general guideline for substituting corn syrup, honey or maple syrup is to start by substituting half the amount of sugar.
If you prefer artificial sweeteners, it is best to add them just before serving. Splenda is the only artificial sweetener recommended for canning. Aspertame-based products lose their sweetness during processing and saccharin-based sweeteners can become bitter.
Fruit can also be canned in any fruit juice (such as white grape juice) or water, if you prefer.
• Treat fruit to prevent browning. Light-colored fruits, such as apples, peaches and pears, can darken, if they are not pretreated before canning. Also, the stem ends of grapes or cherries after they are pitted may discolor. To prevent that, hold the fruit in a solution of 1 teaspoon (or 3 grams) ascorbic acid per 1 gallon of water. Ascorbic acid can be found at health food stores or among the canning supplies at some supermarkets.
Or, use 500-milligram Vitamin C tablets, adding 6 crushed tablets per gallon of water. For commercial antidarkening products, such as Fruit Fresh, follow the manufacturer’s instruction.
Drain the fruit well before packing into jars.
• Leave some headspace. When packing fruit into jars, be sure to leave 1/2 inch of headspace (the space between the top of the fruit and the top of the jar). Overfilled jars can run the risk of not sealing or creating too much liquid loss during processing.
• Prevent liquid loss from jars. Preheat the water in your canner before adding jars to 140 degrees for raw packed jars or 180 degrees for hot-packed fruits. When your processing time is finished, remove the cover from the canner and wait five minutes before removing the jars.
Even if there is liquid loss during processing, it does not mean your food is unsafe. Food that is above the liquid level may darken, but as long as it was processed properly and the jar sealed it is still safe to eat.
• Adjust for altitude. Canning experts can’t say this enough: Processing time must be lengthened when canning at elevations higher than 1,000 feet above sea level.
For elevations between 1,000 and 3,000 feet, add five minutes of processing time to those given in the recipes. For elevations between 3,000 and 6,000 feet, add 10 minutes. At 6,000 to 8,000 feet, add 15 minutes.
The steps
1. Gather and wash all the equipment, including jars, before getting out your produce. Check jars for any nicks, cracks or rough edges that could prevent them from sealing. Canning jars should be washed in hot, soapy water, rinsed and kept hot. This can be done in the dishwasher or by placing jars in the water heating in the canner.
Jars that will be processed less than 10 minutes need to be sterilized. Do this by boiling them for 10 minutes plus an additional minute for each 1,000 feet of altitude. Follow the manufacturer’s instructions for heating and holding lids.
2. Fill the canner about halfway with hot water and begin heating it on your stove. You’ll need the water to be 1 to 2 inches above the jars once they are placed in the water. After using it once or twice you’ll get a feel for how much water needs to go into the pot. Start heating a second pan of water in case you need to add more. You should also remove water from the canner, if it’s too deep, once jars are placed inside.
3. Prepare food according to recipe instructions and pack into jars, leaving the recommended head space. Use the bubble wand to free any trapped air.
4. Wipe the rims of the jars with a clean, damp cloth and use the lid wand to place lids on the jars. Put on the screw bands and tighten until fingertip tight. Do not use jar tighteners or more force, or it could cause the lids to buckle.
5. Load filled jars, fitted with lids, into the canner rack and use the handles to lower the rack into the water; or fill the canner, one jar at a time, with a jar lifter.
6. Add more boiling water, if needed, so the water level is at least 1 inch above jar tops. Or remove water as necessary.
7. Turn heat to its highest position until water boils vigorously.
8. Set a timer for the minutes required for processing the food according to the recipe or chart. Start timing when the water returns to a boil. Be sure to check processing times depending on whether it was a raw pack or hot-packed, and the size jars you’re using. Don’t forget to adjust for altitude.
9. Cover with the canner lid and lower the heat setting to maintain a gentle boil throughout the process.
10. Add more boiling water, if needed, to keep the water level above the jars.
11. When jars have been boiled for the recommended time, turn off the heat and remove the canner lid. Let jars sit in the water five minutes before removing. This helps prevent liquid loss from the jars.
12. Using a jar lifter, remove the jars by lifting straight up and place them on a towel, leaving at least an inch between the jars during cooling. Do not tilt the jars as you remove them. Any water left on top will evaporate during cooling or can be wiped off once the jars are sealed and cooled.
13. Let the jars sit undisturbed for 12 to 24 hours. After that, test to be sure the jars have sealed. They should be curved downward and should not move when pressed with a finger. If the jar has not sealed, it should be reprocessed within 24 hours, refrigerated and used within two or three days, or frozen. Do not open jars to replace any liquid that has been lost. It is safe, just use those jars first.
14: Label jars with contents, date and lot number (if you canned more than one batch that day) and store jars in a clean, cool, dark and dry place, between 50 and 70 degrees. If one of your jars spoils then you will know which of the other jars were in that load so they can be thrown out. Remove screw bands to prevent them from sticking or rusting on. They can be washed, dried and stored for later use.
Here are a few recipes for canning summer fruits. Charts with the recommended processing time for fruits can be found on the WSU cooperative extension bulletin “Canning Fruits” at www.wsu.edu, from the National Center for Home Food Preservation at www.uga.edu/nchfp or at www. spokesmanreview.com/food.
Whole Sweet or Sour Cherries
From “So Easy to Preserve,” by the University of Georgia Cooperative Extension
11 pounds cherries (see note)
Sugar syrup or canning liquid of your choice (see above)
9 pint-size canning jars, lids and screw bands
Stem and wash cherries. Remove pits if desired. If pitted, place cherries in ascorbic acid solution to prevent stem-end discoloration (see “Treat Fruit to Prevent Browning” above). If canned unpitted, prick skins on opposite sides with a clean needle to prevent splitting. Cherries may be canned in water, apple juice, white grape juice or syrup. If syrup is desired, select and prepare preferred sweetness from the chart above.
For a hot pack, combine ½ cup water, juice or syrup for each quart of drained fruit in a saucepan and bring to boil. Fill jars with drained cherries and cooking liquid, leaving ½-inch headspace.
For raw pack, add ½ cup hot water, juice or syrup to each jar. Fill jars with drained cherries, shaking down gently as you fill. Add more hot liquid, leaving ½-inch headspace.
Adjust lids and process. Hot-packed pints should be processed for 15 minutes, quarts 20 minutes, adjusting for altitude. Raw-pack pints or quarts should be processed for 25 minutes, adjusting for altitude.
Note: To make a canner load of 7 quart jars, you’ll need about 17 1/2 pounds cherries.
Yield: 9 (1-pint) jars
Approximate nutrition per serving: Unable to calculate due to recipe variables.
Peaches
From “So Easy to Preserve,” by the University of Georgia Cooperative Extension
11 pounds peaches
Sugar syrup or canning liquid of your choice (see above)
9 pint-size canning jars, lids and screw bands
Choose ripe, mature fruit of ideal quality for eating fresh or cooking.
Dip fruit in boiling water for 30 to 60 seconds until skins loosen. Dip quickly in cold water and slip off skins. Cut in half, remove pits and slice, if desired. To prevent darkening, keep peeled fruit in ascorbic acid solution (see “Treat Fruit to Prevent Browning” above). Prepare and boil a very light, light or medium syrup or pack peaches in water, apple juice or white grape juice. Raw packs make poor quality peaches.
For a hot pack, place drained fruit in syrup, water or juice in a large saucepan and bring to boil. Fill jars with hot fruit and cooking liquid, leaving ½-inch headspace. Place halves in layers, cut side down.
Adjust lids and process. Hot-packed pints should be processed for 20 minutes; quarts should be processed 25 minutes, adjusting for altitude.
Note: To make a canner load of 7 quart jars, you’ll need about 17 1/2 pounds peaches.
Yield: 9 (1-pint) jars
Approximate nutrition per serving: Unable to calculate due to recipe variables.
Honey-Spiced Peaches
From “Ball Complete Book of Home Preserving.” Editors wrote, “These zesty peaches add a burst of spicy fruit flavor to any oatmeal or bran muffin mix. Add about 1 cup drained, coarsely chopped peaches to the batter just before baking.”
1 cup granulated sugar
4 cups water
2 cups liquid honey
8 pounds small peaches, peeled, halved, pitted, treated to prevent browning and drained
6 cinnamon sticks (about 4 inches each)
1 1/2 teaspoons whole allspice
3/4 teaspoon whole cloves
Prepare canner, jars and lids.
In a large stainless steel saucepan, combine sugar, water and honey. Bring to a boil over medium-high heat, stirring until sugar dissolves. Reduce heat to low, add peaches one layer at a time and warm until heated through, about 3 minutes per layer.
Using a slotted spoon, pack hot peaches, cavity side down, into hot jars to within a generous 1/2 inch of top of jar. Ladle hot syrup into jar to cover peaches, leaving 1/2 inch headspace. Remove air bubbles and adjust headspace, if necessary by adding hot syrup. Wipe rim. Center lid on jar. Screw band down until resistance is met, then increase to fingertip tight.
Place jars in canner, ensuring they are completely covered with water. Bring to a boil and process for 25 minutes (adjusting for altitude). Remove canner lid. Wait 5 minutes, then remove jars, cool and store.
Note: You also can pack the peaches into 8-ounce jars, using half the quantity of spices per jar. Processing time is the same as for pint jars.
Variation: For a different flavor, substitute 1 large star anise for the cinnamon stick, cloves and allspice in each jar. Use small stars when packing into 8-ounce jars.
Yield: About 6 pint jars
Nutrition per serving: Unable to calculate.
Cinnamon Pears in Apple Juice
1 to 1 1/2 pounds pears (3 to 5 medium) per pint
Cinnamon sticks
Unsweetened apple juice
Prepare boiling water canner. Heat jars and lids in simmering water until ready for use. Do not boil. Set bands aside.
Wash pears. Drain. Peel, core and cut into halves. Treat to prevent browning.
Cook pears in water one layer at a time until hot throughout. Heat apple juice to a boil.
Pack hot pears, cavity side down, into hot jars leaving 1/2 inch headspace. Place 1 cinnamon stick in each jar.
Ladle hot juice over pears leaving 1/2 inch headspace. Remove air bubbles. Wipe rim. Center hot lid on jar. Apply band and adjust until fit is fingertip tight.
Process filled jars in a boiling water canner for 20 minutes, adjusting for altitude. Remove jars and cool. Check for seal after 24 hours. Lids should not flex up and down when center is pressed.
Yield: Varies
Nutrition per serving: Unable to calculate