12 Days of Crafting, Day 3: freezer paper T-shirts
Welcome to Day 3 of the 12 Days of Crafting.
Don’t forget to send me (megan.cooley@comcast.net) pictures of holiday crafts you make—whether you follow my projects or have your own thing going on. I’d love to post them here.
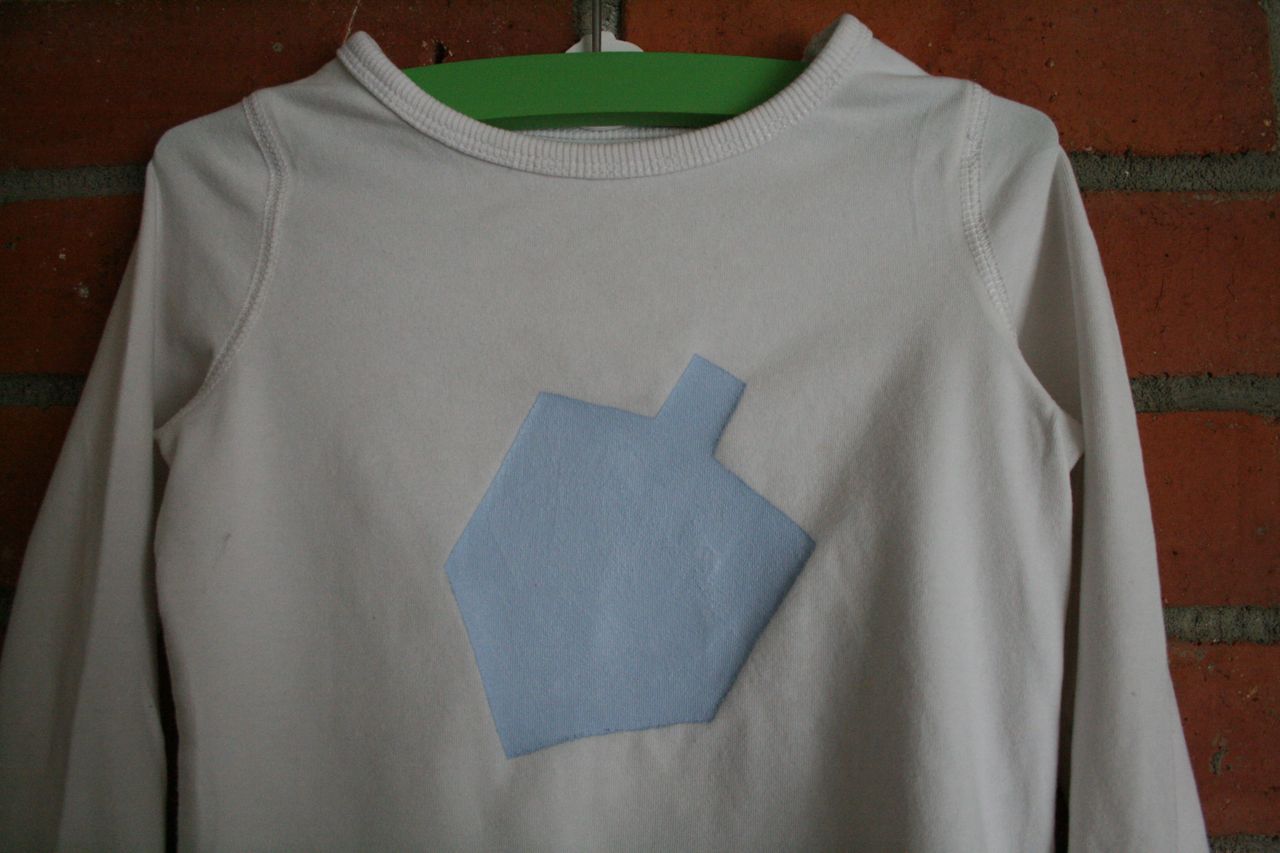
Today’s project—freezer paper silhouettes—can be adapted for many uses. Here I’ll show you how to stencil a dreidel onto a T-shirt, just in time for Hanukkah.
You can follow these instructions for any image or canvas. At the end of
this slideshow
, you’ll see a deer I painted onto holiday fabric, which I then stapled to an art frame.
You will need:
-
a T-shirt or baby’s onesie, washed and dried
- fabric paint
- a paint brush or sponge brush
- small scissors
- an iron and ironing board
-
a pencil
- freezer paper (which is available near the plastic wrap and aluminum foil in most grocery stores)
- a simple drawing of a dreidel or any other image you’d like to stencil. Perhaps a menorah? A Christmas tree? Someone’s initial? If you’re reading this after the holidays have passed, how about making a shirt for a birthday kid with the number of years they’re turning on front (1, 2, 3, 4, etc.). Tip: You can find pictures online by searching on Google Images. Then, just print out the picture the size you want it to appear on your shirt.
1. Place the drawing underneath a piece of freezer paper with the waxy side of the freezer paper facing down and the smooth side up. Trace the image onto the smooth side of the freezer paper with a pencil.
2. Set aside the original drawing (you won’t need it anymore). Using small scissors, cut out the image from the freezer paper, leaving the paper that surrounds it intact. Essentially, you’re making a stencil.
3. Heat your iron to a medium setting. Place the freezer paper stencil waxy-side down on the shirt, positioning it so the image will appear where you want it. Iron the paper onto the fabric for about 10 seconds. It will adhere to it temporarily.
4. Place a few sheets of scrap paper inside your shirt so the paint doesn’t bleed through to the shirt’s back. Dab your paint onto the fabric inside the stencil (don’t stroke the brush side to side because the paint could creep under the edges of the freezer paper). Cover the entire area, and then allow the paint time to dry.
5. Once it has dried completely, carefully peel off the freezer paper to reveal the stenciled image on your fabric.
6. Wear your shirt with pride knowing it’s a one-of-a-kind creation.
T-shirts like this make great favors for a kids’ holiday party or making them can serve as a fun party activity itself.
* This story was originally published as a post from the marketing blog "DwellWellNW." Read all stories from this blog