Tutorial: How to Make Fabric Flowers
Fabric flowers seem to be the rage right now, whether you put them in your hair or pin them on your sweater.
That’s why I wanted to include them in the make-and-take craft booth Down to Earth hosted at the North Idaho Fair last week. I think of the three projects we made with fairgoers that day this one really illustrated how you can take something old and discarded—like funky sheets or a secondhand dress—and turn it into something beautiful.
This is the final tutorial I have to share from that day. But don’t fret. As the holidays approach, I’ll be writing up more how-to crafts on Dwell Well so we can all get our creative fix.
The instructions here are for handstitching, but you could easily whip these out with a machine.
Go
here
for a photo-illustrated version of these instructions.
How to Make Fabric Flowers
You will need:
needle and thread
2 felt (or fleece) circles, about 3/4 inch in diameter
A button
A strip of fabric that’s about 2 inches by 30 inches long*
Bobby pin or other hair clip
*Option: if you don’t want a frayed edge, your strip of fabric should be about 4 inches by 30 inches long
1. Thread your needle. Insert it on one end of fabric strip, then make a “running stitch” along one of the fabric strip’s long ends, going in and out of the fabric every 1/4 inch or so.
2. Once you’ve stitched all the way to the end, pull the thread so the fabric bunches up near the knot. Tie a knot to hold the bunching in place, but don’t cut the thread yet.
3. Sew together the two short ends of the fabric strip with the right sides of the facing each other so that your “circle” is closed. Knot and cut the thread.
4. Hold one felt dot in the center of the front of the flower and the other dot directly behind it on the back side of the flower, sandwiching the bunched-up part of the fabric flower inside the two felt dots. The felt dots are basically going to hide the messy part of the flower where your running stitch is.
Thread your needle with thread that matches the dots. Stitch through all layers, making your way around the dots. Knot and cut the thread.
5. Thread a needle with thread that matches your button. Sew the button to the front of the flower, starting with your needle coming up through the back side. Knot and cut thread.
6. Sew a bobby pin or other clip to the felt dot on the back side of the flower.
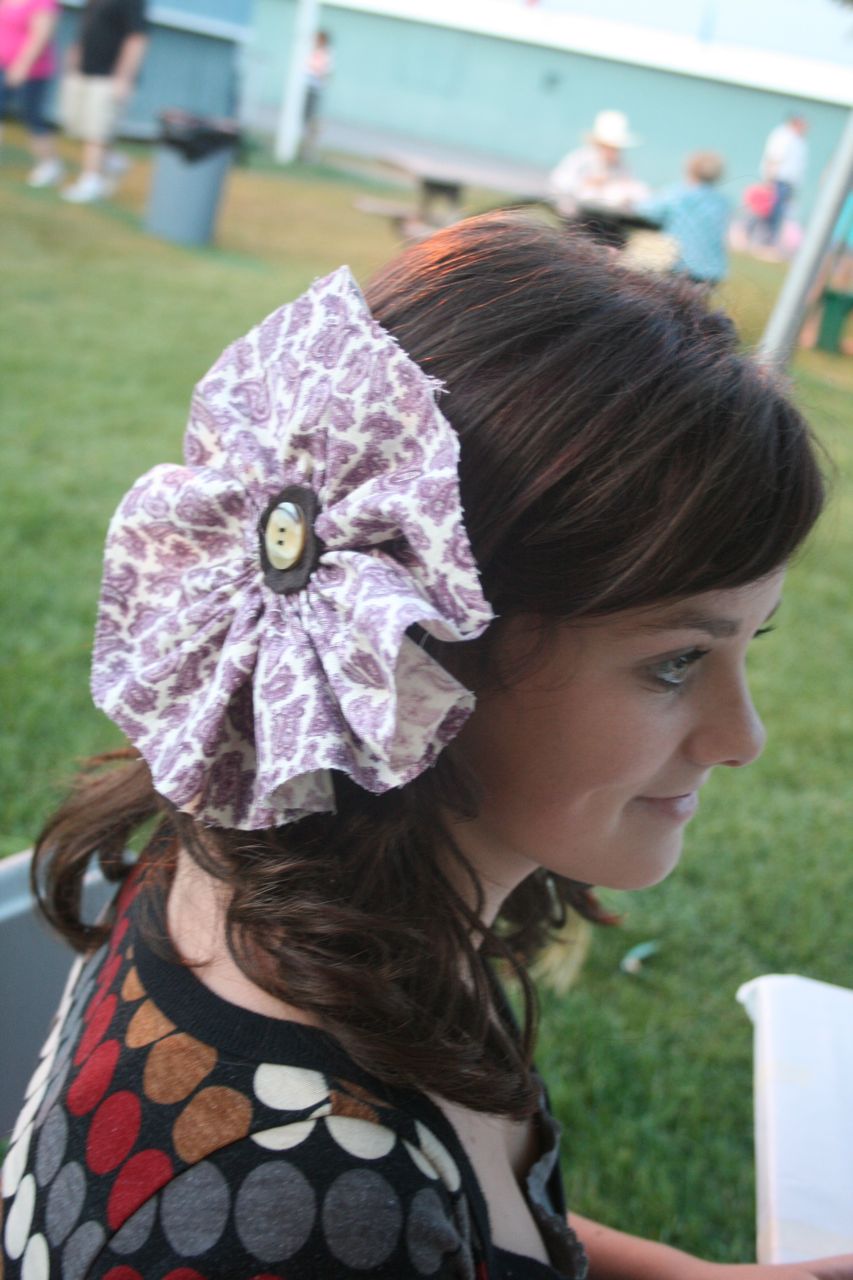
7. Put the flower in your hair and feel fabulous.
*If you follow the instructions above, the edges of your flower will fray. I’m kind of on a fray kick right now, so I’m cool with that.
But if you want your flowers to have a more finished look, cut your fabric strip twice as wide as you want the finished flower to be (4 inches wide instead of 2). Then, before you begin your running stitch, fold it in half lengthwise so the two long raw edges are together (wrong sides facing). Next, do your running stitch through the two layers of fabric and all your messy raw edges will be in one place—tucked underneath the felt dots eventually.
Another alternative is to make two flowers, one slightly larger than the other, and then layer them on top of each other before you sandwich them in between the felt dots.
As with all the tutorials, please drop me a note if you end up making a flower. I’d love to post your creations here on Dwell Well.
* This story was originally published as a post from the marketing blog "DwellWellNW." Read all stories from this blog