Do-it-yourself decorations
Making your own Christmas ornaments can prove both personal and inexpensive
Coeur d’Alene crafter Rebecca Martin’s Christmas tree ornaments were a hit at last month’s Custer’s Christmas Arts & Crafts Show at the Spokane County Fair and Expo Center.
She said the colorful round decorations – which are made from the tops of aluminum food cans – had two things going for them: They could be personalized with someone’s name or other message and, perhaps more important, they were cheap.
“The economy is down, but most people can afford an ornament for $2.25,” she said, in between helping a stream of customers at the show.
Ornaments can be even less expensive, if you make them yourself. Because they’re small, they usually only require some small bits of materials to make.
They also can be the ultimate entry-level project for children or adults just beginning to tap into their creative sides, or intricate works of art in the hands of more skilled crafters.
“Instead of throwing away scraps, I make something out of them,” said Sarah Bennyhoff, another vendor at the Custer show.
One of her products was a vintage-looking fabric candy cane adorned with rusty-looking jingle bells.
She “antiqued” red-and-white-striped fabric by soaking it in a bowl of tea overnight (coffee works just as well, she said). After the fabric dried, she cut two pieces in the shape of a candy cane and sewed them right sides together.
Bennyhoff left an opening so she could turn the candy cane right side out, stuff it, and then sew the opening shut by hand. To hide the hand-sewn edge, she tied a slightly frayed fabric scrap around the cane like a bow and attached the bells.
The Spokane woman also uses scrap materials to make faux popcorn and cranberry garland. Instead of edibles, she strings tubular-shaped Styrofoam packing peanuts and red wooden beads on jute or hemp string. The result is a garland that won’t rot by next Christmas.
Another clever twist on tree garland at the show was strands of paper origami cranes on a tree decorated by the Spokane business Anemone Handmade Paper Flowers. After making and stringing together dozens of paper cranes, owners Mary and Nathan Eberle hung the garland from the top of the tree down to the bottom, rather than horizontally around the tree.
Instructions for making a paper crane can be found at monkey.org/~aidan/origami/crane.
If you have felt and either a sewing machine or just needle and thread, you can make another type of garland in a matter of minutes.
Cut circles of felt using regular scissors, pinking shears or scalloped-edge scissors, then sew the circles together by hand or by running them through a sewing machine, overlapping them slightly. You can use red and white, to mimic popcorn and cranberries; traditional Christmas colors, such as red and green; or a punchy color combination, such as red and aqua.
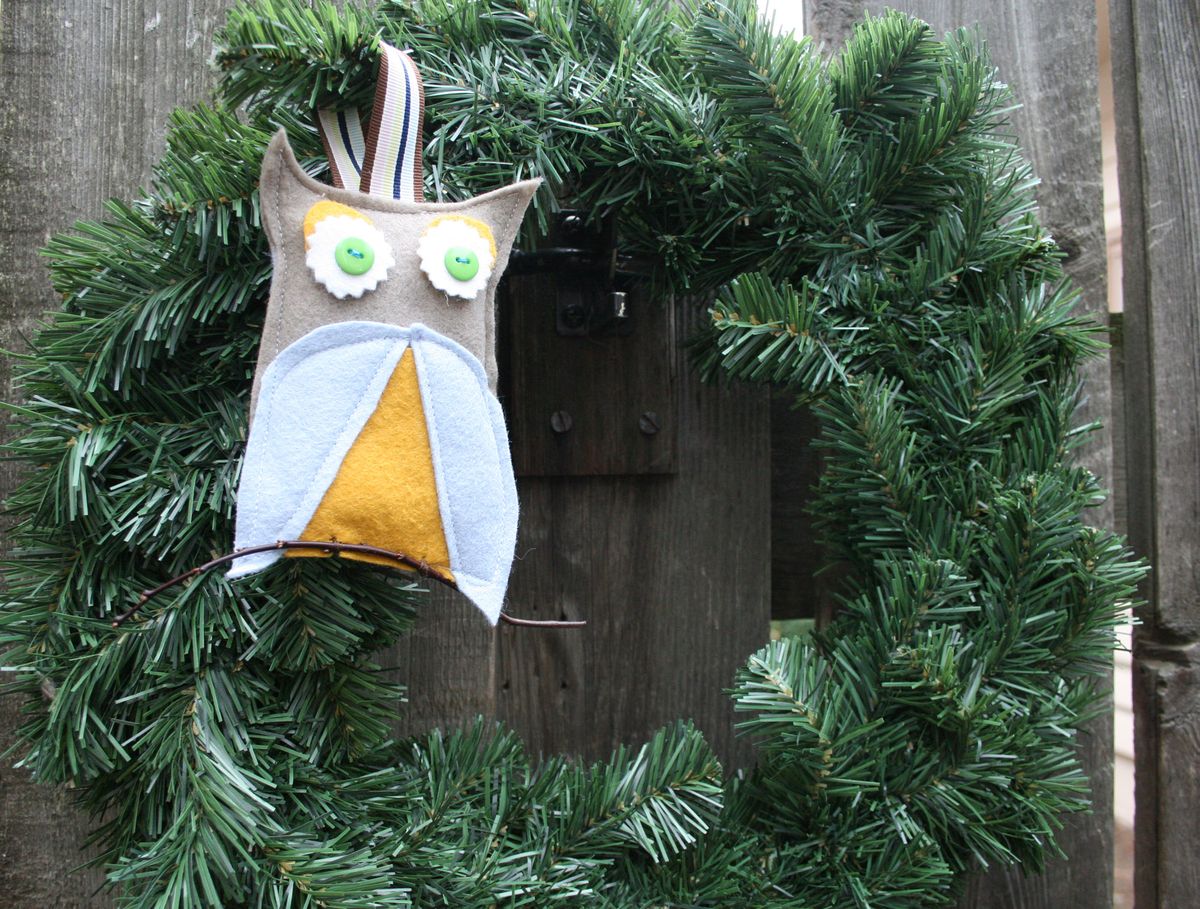
Felt is an easy material to use for ornaments because its edges don’t fray. You could set a theme for your tree, such as a “woodland wonderland,” and make several squirrels, owls, deer, mushrooms and other figures that fit the mood.
First, cut two identical pieces in the shape of the ornament’s main body. If you’re making an owl, for example, cut a shape with two pointy ears and a rounded bottom.
Now cut the animal’s details from felt scraps, including wings, eyes and a belly. Sew the details to the top body piece, perhaps adding buttons or other embellishments. Then, sew the top and bottom body pieces together with a small amount of stuffing between them.
In the case of an owl or other bird, you might consider hand sewing a small twig from the yard to the bottom of the ornament so the critter looks like it’s perched in a tree.
Ideas for ornaments are endless: Sew a miniature quilt and tuck two wooden clothespin children inside. Sew stuffed birds and pears from colorful fabric for a partridge-in-a-pear-tree theme. Wrap yarn around inexpensive ball ornaments and give them as gifts to friends who knit.
A plethora of free online tutorials exists on the Web for ornament making. Visit Whipup.net and search for “festive tutorials” for hours of Internet inspiration.
Fabric designer Heather Bailey offers instructions for making poinsettia pinwheels on her Web site ( www.heatherbailey.com/pinwheel.pdf).
Although pinwheels themselves aren’t usually used as ornaments, there’s no reason why you couldn’t make several, jab them in between the branches of your Christmas tree before a party, and then send your young guests home with them at the end of the event.
Martin, the crafter from Coeur d’Alene, sold about 300 of her can-top ornaments at the Custer fair last month.
To make them, she uses a special can opener – which she says is available at discount stores and through The Pampered Chef – that removes the entire lid from cans, from the “glue seal” up.
She cleans and dries the lids, paints them with acrylic paint, then adheres a sticker, a fabric motif or an image from wrapping paper or a greeting card with the glue product Mod Podge. Martin sometimes dabs a bit of glitter on top of the Mod Podge, too.
Then, using a nail, hammer and old cutting board, she pokes two holes in the can lid at about 10 and 2 o’clock and inserts a piece of 20-gauge wire so the ornament can hang.
Finally, Martin personalizes the ornaments with people’s names or silly sayings.
One Santa Claus ornament for sale at the fair read: “Jolly fat men welcome here.”