Save money, water by installing a barrel
There’s no doubt many Northwest rain barrels have been overflowing during this very wet late winter and early spring.
Installing one yourself can earn you some bonus points for being eco-smart and constructive. It’s a relatively easy and inexpensive weekend project that will not only save you money, but help out the environment, as well.
The really great news is when the rain stops, homeowners owning rain barrels won’t need to turn on their faucet as much as their lesser-inclined-to-save-water neighbor, and also will be counting their water utility savings. Since a typical 1/2-inch rainfall can fill a 50- to 55- gallon barrel, that water can be easily used for household needs like lawn watering.
“Rain barrels are a great way to store water and use a natural resource at a later time,” said Tavis Schmidt, owner of Spokane’s Clean Air Lawn Care.
While Clean Air’s primary focus is on organic lawn care, including fertilizing and zero-emissions maintenance, Schmidt also accommodates homeowners wanting to incorporate other elements to their yard, especially for greater sustainability.
“Rain barrels are mostly beneficial for supplemental watering,” Schmidt said. “The best I’ve seen and experienced are the ones that are used regularly and have greater storage capacity as they offer the most benefit to the user.”
Rain water is one of the earth’s most abundant and consistently available natural resources, and is naturally softer, fresher and purer than water from utility holding tanks. Therefore, it’s practical and healthy to use it on flowers, gardens, and lawns.
You can even use the water from your rain barrel to wash your car, even your hair (maybe warm it up a bit). Rain barrels also can prevent flooding by keeping water from collecting around a home’s foundation.
If you’re interested in getting started with barrels, you can either focus on a strategy that saves money or one that saves time.
“Rain barrels are not difficult to set up. It often depends on what the homeowner wants and how much they are willing to spend,” says Schmidt.
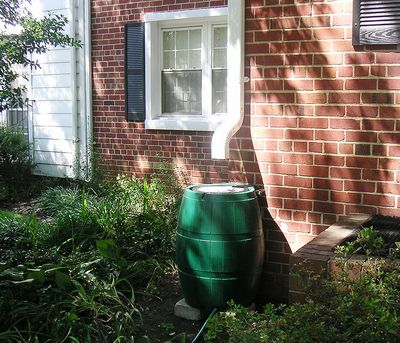
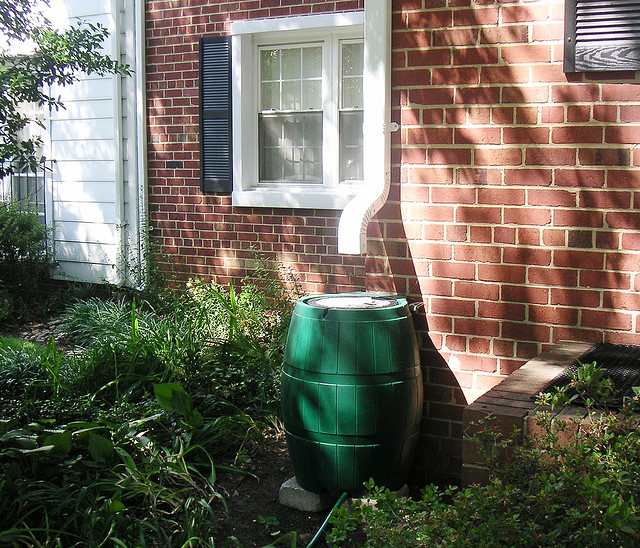
If you don’t have the time or inclination to build your own barrel, you can buy one for anywhere between $69 and $250 from your local gardening or home center. Styles range from simple plastic to stylish terracotta with a built-in flower pot on top, to wood and range in size from 40- to 105-gallons.
There are even rain barrels made from sandstone that resemble a decorative rock.
If interested in making your own rain barrel, 50-gallon food drums work well, or if you have access to an old wooden barrel, that’s even better. Whatever your container, it will need a cover.
“Things to watch out for usually relate to stagnating water. They can be breeding grounds for mosquitoes. Also debris can get in the barrels and add to the level of maintenance,” said Schmidt.
Ensuring your rain barrel has a cover will prevent leaves and dirt (as well as animals) from getting in. If there is no cover, securing wire mesh, like a window screen, over the opening will suffice.
If seeking an old food drum (do not use drums that have contained chemicals), you’ll want a heavy-grade plastic that doesn’t allow light to penetrate, as light will encourage algae growth. Call around to drum or barrel suppliers or even local restaurants; cost shouldn’t exceed $10 to $20.
Once you’ve found a barrel, wash it out with a mixture of water and hydrogen peroxide to remove any food residue.
Next, drill a hole, slightly smaller than the diameter of the spigot you’ve purchased, a few inches from the bottom. Once your hole is drilled, simply push the spigot into the hole and caulk on the inside of the barrel.
To install, find a level piece of ground, close to your flower beds and gardens. Typically rain barrels are placed under downspouts. However, if you don’t have gutters, placing the barrel under a valley in your roof where the water flows off will work too.
Now build a platform since elevating your rain barrel will make it more accessible for a watering can to be placed under the spigot and allow gravity to help the water flow more freely through your hose to your garden. Cement blocks work well as they are sturdy, inexpensive, and can easily be stacked according to the height at which you want your barrel.
Once your platform is done, put your rain barrel in place and cut the downspout to size. If your barrel has a solid top, cut a hole for the downspout with a jig- or saber- saw.
Collect even more rainwater by installing a series of barrels connected with overflow tubes (pieces of hose) located a few inches from the top. As one barrels fills, the overflow will pour into the next one, and so on.
Before starting your project however, be sure to check local building codes, as well as your homeowners and community associations for any restrictions as to the type of rain barrel you can use and where it can be placed. Although rare, it’s always better to check ahead than to find out later after you’ve done the work.
Other things to be aware of are draining your rain barrel for the winter, as any water left inside can freeze and cause the barrel to crack, and keeping your rain barrel independent from your existing house piping and sprinkler system to prevent any cross-contamination to your potable water.
To watch a Washington State University Extension Office video on creating and installing rain barrels, visit http://clark.wsu.edu/volunteer/ws/rainbarrel.html.