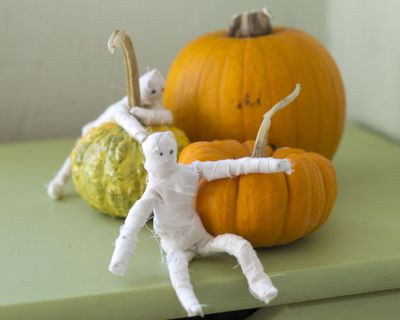
Mini mummies for spooky fun

Count me among those who find the “Elf on the Shelf” just a bit creepy. That said, wouldn’t it make more sense to have a slightly spooky creature keeping an eye on your kids around Halloween instead of Christmas?
With just a few inexpensive craft materials, you can make a miniature mummy perfect for perching on shelves. They’re easy enough for kids to make on their own with a wooden bead, pipe cleaners, cotton balls and fabric.
MATERIALS:
3/4-inch round wooden craft beads
Two 12-inch pipe cleaners
One cotton ball
Strips of muslin fabric
Black permanent marker
Optional: glue
INSTRUCTIONS:
1. Cut muslin into 1/2-inch wide strips. I purchased 45-inch-wide muslin, and used four strips for each mummy. While you can also tear fabric instead of cutting it, I found the muslin frayed too much, so I cut it with a rotary cutter.
2. Slide bead to the midpoint of one of the pipe cleaners, and twist the pipe cleaner around the bead to form the head and neck.
3. Continue twisting the pipe cleaner together for about an inch to form the torso.
4. Using your fingers or a pencil, make a hole through the middle of a cotton ball, hold the ends of the pipe cleaner together, and slide the cotton ball onto the twisted section to add padding to the torso. This step can be skipped if you want an especially skinny mummy, or you can add extra cotton balls to the arms and legs later for a chubbier version.
5. Spread the ends of the pipe cleaner apart under the torso to form the legs.
6. Wrap the second pipe cleaner around the body, just under the head, to form the arms, folding each end inward to shorten the arms.
7. Starting at the head, wrap strips of muslin around the mummy body. A bit of glue is helpful on the rounded surface of the bead, and at the ends of the arms and legs. Two strips should be enough to cover the head, torso and arms, with two more for the legs.
8. Use a black marker to make two small dots for eyes.