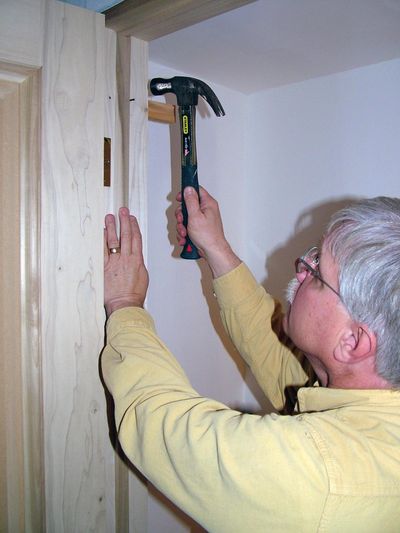
Ask the builder: Installing a pre-hung door

Q: I purchased a pre-hung interior door and now need to install it. I thought it would be easy to do, but I’ve discovered it does seem to take some skill and magic. What can you share with me to get me out of this pickle? –Brad G., Clemson, S.C.
A: Admit it. How many times have you jumped into a job and started to flounder? You may only have the weekend to get something done, and challenges can quickly transform into disasters.
There are lots of steps to installing a pre-hung door. It’s important to realize that the rough opening needs to be about 1/2 inch to 1 inch wider than the outer width of the door frame. You need this wiggle room to be able to install wedge-shaped shims.
The goal is to have a consistent gap between the door and the door frame. This gap is usually 1/8th inch. The hardest part for most rookies is getting the gap along the top of the door to be the same. One or both of the side jambs usually need to be cut off to get the top gap perfect.
Be sure to install the shims behind the door hinges. The most important step after the door is installed is to install a 2.5-inch, or 3-inch, screw in one of the screw holes of the top hinge. This screw needs to penetrate through the door jamb and embed itself into the rough lumber of the wall. This screw ensures the door will not droop over time, causing it to rub against the jamb.
I have detailed step-by-step tips and videos for installing a pre-hung door at go.askthebuilder.com/installprehungdoor.
Q: What can you share about installing fence posts? My online research has me more confused than ever. Quite a few websites talk about putting concrete around each fence post. Is this a good idea? Are there other options? How deep should fence posts be? I don’t want to waste time or money. –Ken S., Tulsa
A:
In my opinion, the advice offered by those promoting concrete is ill-advised. I prefer to look at the way ranchers and farmers install fenceposts. If they do use concrete, it’s often only at corner posts and around gate posts in a fence line.
If you have strong soil, the compacted soil will do a remarkable job of supporting a fence post. As you install the soil around the post, just add four inches of soil at a time and compact it using a two-by-four as a tamping tool.
You can use crushed gravel around fenceposts too. It’s important to realize the gravel should have an assortment of sizes, including fines. Fines are sand-sized crushed rock and the resulting dust from the crushing process. This fine material helps interlock the larger pieces of angular gravel with one another.
Crushed gravel, once it’s compacted and damp, is nearly as strong as concrete. The advantage over concrete is that if you have to remove the fence post, you can remove the gravel with far less effort than if you had to break apart the concrete around a fencepost.
The depth of fence posts is important. Shallow fenceposts create a fence that tips over with ease. If you live in a windy area, your fence could blow over.
I’ve had the best luck installing fenceposts about 2 feet deep. This works well for a standard 4- to 6-foot tall fence. If you plan to have a tall fence over 6 feet, then you might want to have your post extend 30 inches below the surface.
Be sure to call 811 if you intend to dig fencepost holes. There might be all sorts of underground utilities in your yard and the last thing you want to do is cut a power or communications cable. Puncturing a gas or water line might also ruin your day.
I have other fence post tips and videos waiting for you at .
Tim Carter can call you on the phone for FREE to solve your problem. Go to his website and fill out the form on this page: https://www.askthebuilder.com/ask-tim/.