Marshmallows that Martha would love
There are some things we modern American women do not deign to make from scratch.
Hamburger buns, for instance. Graham crackers. Ketchup. Peanut butter.
We pluck these products off the store shelf and don’t even feel guilty about it.
(And if you are somebody who insists on making any of these things in your own kitchen, I don’t want to hear about it. Don’t send me your recipes. Don’t call me with your stories. You people are freaks. You people are aberrations.)
Ask the lady on the bus if she makes her own marshmallows and she’ll look at you as if you’d just asked if she tanned the leather for her pumps.
A couple of weeks ago, I would’ve been that lady.
But in honor of spring, in honor of Easter, and, most importantly, in honor of Martha’s recent release from the slammer, I decided to make a batch of marshmallows.
“Why would you do that?” a co-worker asked, making me feel vaguely self-indulgent and guilty.
Why, you ask. Because I wanted to see if I could.
Why? Because Martha told me to.
Why? Because Williams-Sonoma is selling a marshmallow-making kit for $16.50 and I could buy enough sugar, gelatin and corn syrup for that kind of money to construct a summer home out of marshmallows.
Why? Because homemade marshmallows are much fresher, much gooier, and much more marshmallow-y than anything you’ll ever find in a Jet-Puffed bag.
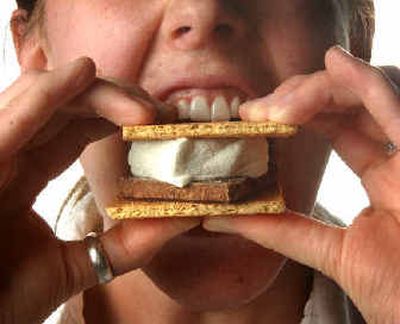
But could I do it? Or would my dreams of s’mores and rocky road candy turn into a sticky, gluey reality that would fry my hand-held mixer and leave me with a kitchen covered in white goo?
Wanting to avoid the latter, I did some research.
I was surprised — and maybe a little alarmed — to see how many people have made marshmallows at home.
Don’t you people have anything better to do, I wondered. Then I remembered: I’m one of those people.
For something with just a few basic ingredients (water, sugar, corn syrup and gelatin), I found some major variations between recipes. Some called for two packets of gelatin, others nearly twice that much. Some called for a cup of corn syrup, others a half cup. Some used corn starch. Others listed egg whites.
Not wanting to spend the next week up to my elbows in marshmallow, I compared the recipes and decided to go with one from Gourmet magazine found on www.epicurious.com. I trust the source, plus, dozens of readers wrote to the Web site praising the recipe (some even said it was easier and better than Martha’s. Could it be true?)
I ended up modifying the recipe and instructions a bit, based on what I’d read, but largely followed it as written.
A few things I learned:
Read the recipe. Then read it again. Commit it to memory, if possible, so you don’t have to refer to it while marshmallow goo climbs up your beaters.
Make sure your pan is ready to go and all of your ingredients are lined up before you start cooking anything.
You’ll need a candy thermometer.
A stand mixer would be a plus, but not a necessity. (I read horror stories online of marshmallow-makers burning out the motors of their hand-held mixers, but mine survived unscathed. Take some breaks during the beating, though, if you don’t think yours is up to the task.)
Be prepared for the goo to take on a life of its own. It will climb up the beaters and you’ll have to keep knocking it down. Don’t be alarmed.
A pizza cutter is the best tool for slicing the finished marshmallow slab into cubes.
Dunk all of your pots, bowls and utensils in warm, soapy water as soon as you’re done. It looks like it never will, but the marshmallow melts right off.
“What’s that?” my husband asked when he saw the baking pan lined with white fluff on the counter.
“Marshmallows,” I said proudly.
But they weren’t quite marshmallows yet. They had to sit overnight in the fridge to firm up. The next morning, after I pried the slab out of the baking pan, sliced them into cubes with the pizza cutter, and tossed each one in a little powdered sugar and corn starch, they were, in fact, marshmallows.
And they were, in fact, yummy.
Will I make them again?
Probably not.
But I’ll remember them fondly the next time I pluck the Jet-Puffed bag off the shelf.
Marshmallows
From Gourmet magazine, December 1998
About 1 cup confectioners’ sugar
3 1/2 envelopes (2 tablespoons plus 21/2 teaspoons) unflavored gelatin
1/2 cup cold water
2 cups granulated sugar
1/2 cup light corn syrup
1/2 cup hot water (about 115 degrees)
1/4 teaspoon salt
2 large egg whites (or reconstituted powdered egg whites if safety is a concern)
1 teaspoon vanilla
Oil bottom and sides of a 13-by-9-by-2-inch rectangular baking pan and dust bottom and sides with some confectioners’ sugar.
In bowl of a standing electric mixer or in a large bowl, sprinkle gelatin over cold water and let stand to soften.
In a 3-quart heavy saucepan cook granulated sugar, corn syrup, hot water and salt over low heat, stirring with a wooden spoon until sugar is dissolved. Increase heat to moderate and boil mixture, without stirring, until a candy or digital thermometer registers 240 degrees, about 12 minutes. (Don’t be surprised if it takes longer than this; it took us about 20 minutes to reach this stage) Remove pan from heat and pour sugar mixture over gelatin mixture, stirring until gelatin is dissolved. (Be sure to stir very thoroughly, or you’ll wind up with hard blobs of gelatin in your marshmallows.)
With standing or hand-held electric mixer, beat mixture on high speed until white, thick and nearly tripled in volume, about 6 minutes if using standing mixer or about 10 minutes if using hand-held mixer. In a large bowl with cleaned beaters, beat egg whites until they just hold stuff peaks. Beat whites and vanilla into sugar mixture until just combined. Pour mixture into baking pan and sift ¼ cup confectioners’ sugar evenly over the top. Chill marshmallow, uncovered, until firm, at least 3 hours and up to 1 day.
Run a thin knife around edges of pan and invert pan onto a large cutting board. Lifting up one corner of inverted pan, loosen marshmallow with fingers and let drop onto cutting board. With a large knife (we found an oiled pizza cutter works best) trim edges of marshmallow and cut marshmallow into roughly 1-inch cubes. Sift remaining confectioners’ sugar (we added about a half cup of cornstarch to the mix for a silkier texture) into a large bowl and add marshmallows in batches, tossing to evenly coat. Marshmallows keep in an airtight container at cool room temperature one week.
Yield: One 13-by-9-inch pan, about 96 marshmallows
Approximate nutrition per marshmallow: 24 calories, no fat, less than 1 gram protein, 6 grams carbohydrate, no cholesterol, no dietary fiber, 9 milligrams sodium.
Rocky Roads
From “The Family Circle Encyclopedia of Cooking”
1 pound rich milk chocolate, coarsely chopped
1 cup broken pecans or walnuts
1 cup small marshmallows
Line an 8-by-8-by-2-inch pan with foil.
Melt chocolate in top of double boiler over hot, not boiling water. Remove from heat and spoon half of the melted chocolate into the lined pan. Spread to edges. Return remaining chocolate to heat.
Sprinkle nuts and marshmallows over chocolate in pan. Spoon remaining chocolate over the top. Let stand at room temperature until firm.
Turn out onto cutting board. Remove foil. Cut into pieces.
Note: We added about 3/4 cup coarsely crushed graham crackers to make these more like s’mores. Toss in the crackers when you add the nuts and marshmallows.
Yield: About 1 1/2 pounds
Approximate nutrition per 1-ounce serving: 163 calories, 11 grams fat (4.5 grams saturated, 57 percent fat calories), 2 grams protein, 17 grams carbohydrate, 5 milligrams cholesterol, 1 gram dietary fiber, 20 milligrams sodium.