Beyond the triangle: For a creative jack-o’-lantern, get the right tools and a little planning
Using a few tricks, families carving jack-o’-lanterns can go beyond triangle eyes and a toothy grin. An orange canvas can be transformed into myriad images.
First, they can search for patterns online or in carving kits – often labeled beginner, intermediate or advanced. Then, locate the kits, small saws or similar hand-held tools. These ideas are among tips from Eric Frickle, the Kitchen Engine’s co-owner. He has literally crafted hundreds of creative gourds, though less often these days.
As a family tradition for more than a decade until 2009, Frickle joined his parents Dan and Vicky Frickle, sister Emily and friends in Otis Orchards to carve 100 to 200 pumpkins to display each Halloween. Frickle, now with his family, said he and his kids might carve just one pumpkin each this year, but he knows the drill.
“Some people might have the artistic ability to draw their own patterns,” Frickle said. “You just have to think of it as more than just a drawing, because when you’re done with whatever you’ve cut out, the pattern still has to support itself somehow in the pumpkin. To me, the most intriguing part of the art of carving pumpkins is coming up with something that looks really cool, but also still can support itself as a three-dimensional thing without collapsing.”
So with any pattern, think about its connective construction, using the body of a pumpkin. But that doesn’t have to be limiting.
Here are some of Frickle’s tried and true tips:
Transfer the pattern. Frickle said the best method is to use a connect-the-dots system for transferring a pattern onto the pumpkin, versus just staring at the picture on paper and trying to carve it. People can use a printer or copier to enlarge an image to the right size for the pumpkin, then tack the paper with the design onto the pumpkin.
Use a tool to poke dots through the paper onto the pumpkin’s surface for a connect-the-dots line, or outline, then remove the paper and start carving along that. To poke holes, his dad started with a pie tester. Later he switched to an X-Acto knife base with a sharp point more like a pen’s end.
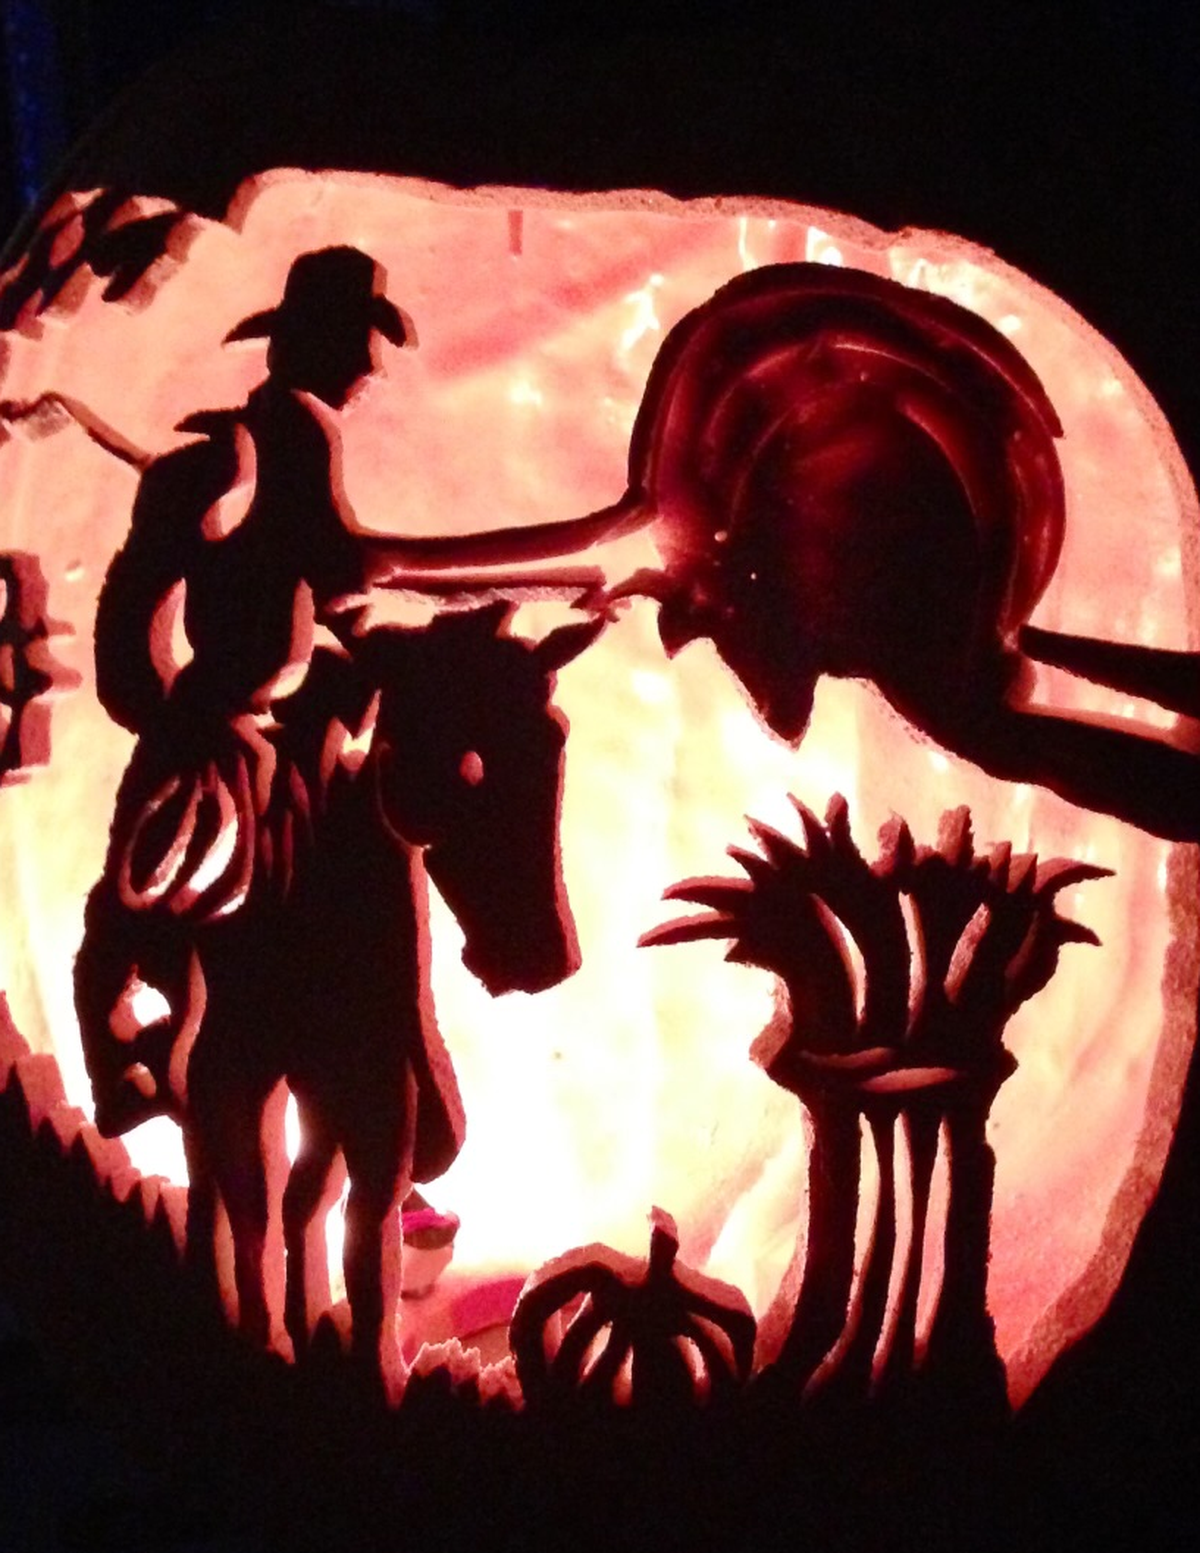
Think outside basic shapes. The patterns among Frickle’s favorites were ones with trees and landscapes, while overlapping negative and positive images. Research patterns for a 3D effect, if desired.
One pattern had a large tree on one side, and on the other side, a Grim Reaper holding a little jack-o’-lantern. “He was standing by this tree, but behind the tree was a full moon, so like the tree itself was a positive image on top of the full moon, but as the branches went past the full moon, they became negative cutouts.”
Scooping guts, with purpose. Make sure you’ve scooped the pumpkin enough that a saw will go through. And scrape behind the face where you’re going to carve, while testing with the saw to see how far in it goes and trying to use that as a gauge for an even depth. Don’t overdo. Among various tools, an ice scoop works the best, he said.
Use the right tools. You can use a kitchen knife, but mostly that tool will limit the carves to basic shapes, Frickle said. “I think that’s where the triangle eyes and triangle nose came into popularity, because once you put a knife in, it’s really hard to turn it. It’s sort of a straight cut, then you plunge it in again and make another straight cut. With those little saws you can buy specifically for pumpkin carving, you can turn and make cuts that aren’t perfectly straight.” Saws aren’t necessarily sharp but allow a slow back-and-forth motion for more intricate work. “Unfortunately, the company that we used to buy all the little saws from quit making some of the really fine saws that you need to do some extreme detail.” However, he said you can usually find basic ones still in kits. And avoid electric tools, which Frickle said proved to be “a complete disaster” on a pumpkin’s delicate frame. A drill might work if you want the effect of small holes.
Start in the middle. Especially for intricate work, go from the middle out to keep a structure that won’t collapse, he said. “As you’re working your way out, there is always some strong connection to the outside of the pumpkin, which is going to hold its shape and hold the structure of the pattern. If you started from the outside and worked your way in, you’d get to a point where whatever your pattern was on the outside might be so weak you can’t even cut those inner pieces out.”
Angle slightly. You want to angle your saw blade a little past 90 degrees – tipped slightly outward – so when you complete the shape, you can push the section through to the inside of the pumpkin. “That’s going to allow the maximum amount of light to come out. If you angle it the other way, then when you’re done cutting you have to pull the piece out of the front of the pumpkin and that doesn’t let light out and you don’t see the pattern the way it was intended.” The meat of the pumpkin can be up to 2 inches thick, so the small outward tip avoids the outward parts becoming slightly larger.
Go beyond pumpkins. With pumpkins being expensive these days, perhaps $5 to $10 apiece, families might want to find alternatives. Before the Frickle tradition ended, the family carved some patterns into foam display pumpkins that won’t erode and can be lit with LED lights. A squash also can be a friendly host. His dad likely will carve giant zucchinis left too long in the garden. “He cuts those, hollows them out and carves little faces on them. It looks like they’re singing. He puts lights in them and makes a little zucchini choir.”
Time it for Halloween. Frickle suggests waiting to carve the pumpkins until a few days before – or better on – Halloween, and more intricate patterns don’t tend to last more than a day. LED lights inside work better than candles to keep temperatures down. If you carve early, it works best to spray the surface with lemon juice and cover the face with cellophane, then keep it cool. With warmer temperatures this fall, outside or in the garage might not be cool enough. Refrigerate or use another cool place close to refrigerator temperature. Don’t let it freeze to avoid mush. A week out, his family used to start with simple patterns, leading up to complicated ones on the holiday.
Jack can revive. If your pumpkin creation does shrivel or collapse, and it fits inside a bucket or tank of water, submerge it for a few hours. “The water will reconstitute the pumpkin and it will actually come back.” He and his family discovered that accidentally one year when rain fell on shriveled creations. “It was like they came back from the dead. I remember it vividly, there was one pattern we carved and it was called RIP. It’s just this hand coming out of the ground with an RIP grave behind it, and that hand had completely flopped down inside the pumpkin, because it had dried out and shriveled up. Then it rained, and that hand came back up like a zombie coming out of the grave. My sister and I thought that was pretty cool.”