You can can: The craft of canning
She started with dilly beans – not because her grandmother had introduced her to the spicy snack as a girl, but for a more practical reason.
Simply put, “They’re hard to screw up.”
At the end of each summer, Alyssa Agee usually makes a couple of dozen jars of the pickled green beans for her family to enjoy throughout the coming year – and give as Christmas gifts.
“Everybody loves them because they are crunchy,” Agee said. “They have a little bit of heat. And they make a great accompanying condiment to pretty much any meal or salad.”
But, she said, “I eat them mostly as a standalone snack.”
The 32-year-old self-taught canner is among a growing number of next-generation food preservers who are learning the art and craft of canning, even if it’s something their own mothers didn’t do.
There are many reasons for the renewed interest: knowing what’s in the food they eat, growing their own food or using locally grown ingredients, preventing food waste, cutting food costs – or a combination.
But one thing is certain: Canning is making a comeback.
“It is experiencing a resurgence,” said Anna Kestell, the food preservation and safety outreach educator for Washington State University Extension Spokane County. “I think the reason is that people want to locally source – No. 1 – because that way they know where their food comes from and how it was grown. And, No. 2, they want to know what is in the food. When they can, they control the sugar and salt and other additives.”
According to the U.S. Department of Agriculture, home canning has experienced waves of popularity since becoming widespread during World War I. It maintained a steady following throughout the Great Depression, then went through a deep decline after World War II when the practice reached its peak.
But, according to the USDA, home canning has been regaining popularity since the 1970s. And, Kestell has particularly noticed an uptick in the past four years. Many people who attend her canning and food preservation classes through WSU are first-time canners – folks who range in age from their late 20s to early 40s.
Kestell’s background is in biology and botany, and she’s canned her “whole life.” However, she understands it can be an intimidating undertaking.
Nobody wants botulism, the rare but deadly form of food poisoning linked to improperly canned foods. Nobody wants an exploding pressure canner, either.
So, for those new to canning, Kestell recommends doing what Agee does: using a basic boiling water bath.
“Start with jams and jellies. Those are low-risk foods,” Kestell said. “If you cut your teeth on your jams and jellies, you get the rhythm of canning and learning how to measure head space and things.”
Acidic foods – jams, jellies, pickles, relishes, chutneys, fruits and fruit spreads – can be canned using water-bath processing. Low-acid foods – meat, vegetables and combination recipes such as soups – require pressure canning. Save them for after you’ve mastered the water-bath method. And, don’t be afraid.
“People think it’s scarier than it really is,” said Agee, who started canning six or seven years ago, when she was newly married, living in Portland and growing her own garden for the first time. She wanted to try preserving the bounty of vegetables from her plot.
Now the mother of two young children and a resident of Spokane’s West Central Neighborhood, Agee has come up with her own pickling spice recipe, adapted from the 2010 cookbook “Canning for a New Generation.” In the introduction, Liana Krissoff writes, “When I was growing up, canning was for old folks and cranks and separatists.”
These days, like just about all things DIY, it’s hip. And, it’s rewarding.
“It’s so satisfying making something yourself and getting to enjoy it later,” Agee said.
Since her first batch of dilly beans, she’s added all kinds of canned foods to her repertoire: pickled beets, cucumbers, and spicy carrots and onions as well as whole tomatoes, quartered peaches in vanilla-bourbon syrup, applesauce, tomato sauce and peach, apricot, raspberry and tomato jam.
“If you open a can of something in wintertime, it’s like having a bite of summer,” she said. “It’s amazing. It feels like you’re eating something straight out of the garden again.”
Agee had some experiencing canning as a kid. One set of grandparents lives in Poulsbo, on Puget Sound’s Liberty Bay, and would buy fish “fresh off the boat, and we would can it all that day. We made a production out of it, and then we would go home with almost a year’s worth of tuna.”
Another grandmother canned those beloved dilly beans – along with jams, jellies and smoked salmon that she and Agee’s grandfather had caught themselves. But, “I never did any canning with my grandmother,” Agee said. “She always did it all by herself.”
So Agee learned by doing – through good, old-fashioned trial and error.
Early on, making jams and jellies, “I struggled with timing. I’d overdo it, and it would turn out rock hard, or I’d underdo it and it would turn into fruit compote.”
When she moved on to pickles, her learning curve continued. “I’ve had some epic failures with my pickles,” she said. “If you overheat them they get all mushy, and nobody likes a mushy pickle.”
Agee’s even experimented with a batch of cinnamon pickles. But, she said, “I will never do that again.”
Over time, she’s figured out her own trick for achieving consistency and proper texture – and peace of mind.
“In my own experience, doing the water bath for slightly longer than what the recipe calls for has never hurt,” she said. “It usually gives you more of a sense of security that you did it OK. I usually err on the side of a couple of minutes.”
On a recent Friday afternoon, she had four burners going at once: pickling liquid for dilly beans and dill pickles, tomatoes for tomato jam, peaches for peach jam and a boiling water bath. Most of the fresh ingredients came from the Thursday Market in the South Perry District. And Agee recommends getting the freshest ingredients possible and often looks to her own garden or local farmers or farmers markets.
For those just starting out, she also recommends small batches, which generally means no more than four pint jars.
“It takes you a quarter of the time,” Agee said. “You’re not slaving away in the kitchen all day. It takes you a couple of hours, and you don’t have to buy massive qualities of produce.”
In addition to Mason jars with canning lids and rings, she suggests beginners invest in a wide-mouthed funnel, big soup pot, wire canning basket and jar lifter.
Kestell concurred: “If you’re going to do anything, buy a jar lifter and a good knife. You can use tongs, but jars have a tendency to slip. And the jars need to stay upright all the time so they can seal properly. A jar lifter is relatively inexpensive, and it lasts you a lifetime.”
For home cooks who don’t have a wire basket, Kestell suggested making one by wiring together old canning jar rings. “The whole idea is just to keep your jar bottoms off of the bottom of the pot so water circulates around them,” she said.
Agee prefers wide-mouthed jars – “easier to get things in” – as well as simple instructions. “I’m all for easy,” she said. “I’m not for some complicated recipe.”
But don’t use Grandma’s recipe from the Great Depression or World War II. Canning guidelines have changed. For food safety, “It’s important that everyone uses current recipes,” Kestell said.
Here are a few more tips for water-bath canning from Agee: “You need to make sure you wipe your edges. You don’t want sticky stuff on the edges of your jar. It could prevent it from sealing.
“The water has to be boiling when you put your jars in. Always make sure your water fully covers your jars.
“Don’t be freaked out if your lids have not sealed when you pull them out of the water bath. You need to give them up to an hour.”
Then, give each lid a little poke. “If it boings back at you, it’s not OK.”
Improperly canned foods can kill you. For more information about safety precautions and canning procedures, visit the National Center for Home Food Preservation’s website at nchfp.uga.edu.
On this afternoon, Agee lost one jar of dilly beans. It overturned in the boiling water bath and pickling liquid seeped out. But the rest of the couple of dozen jars all sealed properly and were ready for storage in a cool, dry place. Storage temperatures of between 50 to 70 degrees are recommended.
While Agee’s stuck with the water-bath method so far, she said she thinks it would be fun to try pressure canning now that she’s gotten a hang of the process.
Meantime, she has a few more dozen jars to fill before summer’s officially over.
“I think we appreciate our food more when we have to put some time and effort into creating it,” she said.
Plus, Kestell said, “There is nothing more satisfying than the sound of a jar sealing. You get that little bing, and you go, ‘Oh, yeah.’ ”
Quick Dill Pickles
From “Canning for a New Generation” by Liana Krissoff
3 pounds pickling cucumbers
2 cups cider vinegar (5 percent acidity)
2 tablespoons kosher salt
Fresh dill
Garlic cloves
Pickling spice (see recipe below)
Hot red peppers
Combine vinegar, 2 cups of water and salt over medium heat. Fill jars with dill, garlic clove, a teaspoon of pickling spice and a slice of red pepper, if you like. Pack the sliced cucumbers into the jars and ladle the hot vinegar mix over the top until you reach 1/2 inch below the lip of the jar. Twist on lids and process in boiling water bath for 10 minutes (adjust for high altitude, if necessary). Wait up to 1 hour before checking to see if lids have sealed.
Yield: about 6 quarts
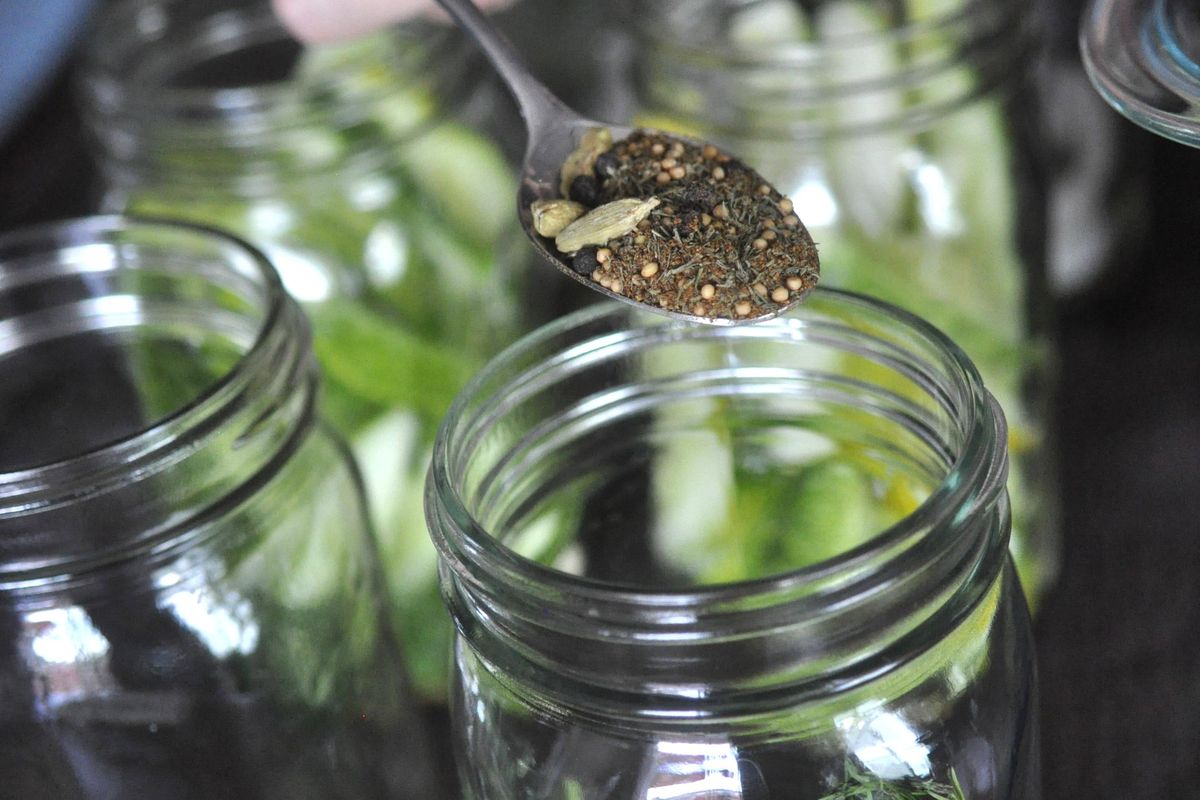
Pickling Spice Recipe
Adapted from “Canning for a New Generation” by Liana Krissoff
2 tablespoons yellow mustard seeds
1 tablespoon allspice
1 tablespoon dill
1/2 tablespoon ground clove
1 tablespoon chili powder
1 tablespoon cinnamon powder
1/2 teaspoon nutmeg
1 teaspoon peppercorns
1 teaspoon coriander
1 teaspoon cardamom pods, crushed
Combine all ingredients and mix well.
Dilly Beans Recipe
Adapted from “Canning for a New Generation” by Liana Krissoff
“It’s a recipe you can adapt for any taste,” avid canner Alyssa Agee said. “I do mine on the milder side because I’m a wuss. I don’t care if you quote me on that. I am. You can add any variety of hot pepper you want. You can do a slightly Asian version and add soy sauce and wasabi.”
4 cups cider vinegar
3 tablespoons kosher salt
Fresh dill
Garlic cloves
Anaheim chili
Red pepper flakes
3 pounds green beans, ends trimmed and cut to fit pint jars
Heat vinegar, 4 cups of water and salt in pan and bring to boil.
Add 1 to 4 garlic cloves, fresh dill, sprinkling of pepper flakes, and a thin slice of the chili to each pint jar. Add more or less pepper flakes and chili pepper depending on how much heat you’d like the beans to have. Pack with beans and pour hot vinegar over the top until you reach 1/2 inch below the lip of the jar. Process for 10 minutes in boiling water (adjust for high altitude, if necessary). Wait up to 1 hour before checking to see if lids have sealed.
Yield: about about 6 pint jars
Peach Jam Recipe
From “Better Homes and Gardens Jams and Jellies”
7 cups sugar
3 pounds peaches finely chopped and peeled
1/4 cup lemon juice
3 ounces liquid fruit pectin
Combine sugar, peaches and lemon juice. Bring to a boil over medium heat, stirring to dissolve sugar. Quickly stir in pectin. Bring to a full rolling boil, stir constantly. Boil hard for 1 minute, stir constantly. Remove from heat and skim foam off with a metal spoon. Ladle into hot half-pint jars leaving a 1/4-inch headspace. Process filled jars for 10 minutes in boiling water (adjust for high altitude, if necessary). Wait up to 1 hour before checking to see if lids have sealed.
Yield: 6 (8-ounce) jars of jam
Amy’s Tomato Jam
From “Food in Jars” by Marisa McClellan
Alyssa Agee has canned tomatoes and tomato sauce.
“It’s a lot of work doing the seeding and the peeling. The end result is fabulous, but it takes so much effort.
“This recipe appealed to me because you don’t have to do any of that. Plus, there are no exotic spices. What it really comes down to is the quality of your tomato. It makes all the difference in the world.”
5 pounds tomatoes, cored and finely chopped
3 1/2 cups sugar
1/2 cup freshly squeezed lime juice
2 teaspoons ginger
1 teaspoon cinnamon
1/2 teaspoon ground cloves
1 tablespoon sea salt
1 tablespoon red pepper flakes
Combine all ingredients in pot and bring to a boil over high heat. Reduce heat to low and simmer jam, stirring regularly, until it reduces to the consistency of jam, about 2 hours. Fill jars, wipe rims and process in boiling water bath for 20 minutes (adjust for high altitude, if necessary).
Yield: 4 pint jars