Season brings bounty of alliums
For those who enjoy cooking with fresh seasonal ingredients, this is a very exciting time of year. Local farmers markets are full of people, produce, music and vibrancy. Spring alliums, in particular, are in full force.
The herbaceous perennials – known for their pungent aroma and flavor-enhancing qualities – include sweet onions, scallions, chives, spring onions, green garlic, ramps and garlic scapes.
It occurs to me that no single ingredient, perhaps besides salt, is more widely used to season food in all cultures, cuisines and countries around the world than alliums.
In France, onions and leeks are the heart and soul of most traditional dishes, one of the three main components of mirepoix, the flavorful base of French soups, sauces and stews – along with carrots and celery – sautéed in butter. The Italian version of mirepoix is called soffritto, made with onions and garlic sautéed in olive oil, the foundation on which most Italian dishes are built.
In Spanish and Latin American cuisine, a slightly different version of this savory base is made with paprika, peppers and, often, tomatoes. Alliums also play a significant role in most dishes throughout Asia, the Middle East and Africa. In Cajun cuisine, onions have been dubbed one of the “holy trinity,” along with peppers and celery, adding a deepness and complexity.
How boring and bland our food would taste without this powerhouse of flavor! Imagine pesto or hummus without a few cloves of garlic, or soup without the soulful depth of onions.
Learning to harness alliums in the kitchen is a fun, lifelong process, not only because of the many types available to us these days, but because of the many ways they can be used to create different effects in the finished dish.
Storage onions – basic white, yellow and red onions that keep for long periods of time and are available year-round at the grocery store – are considered the workhorse onion, the onion you should always have on hand because of their versatility and ability to achieve a myriad of different effects. For example, melting onions over gentle heat, in olive oil or butter, expelling their moisture, will concentrate their flavors. The longer you sweat onions, the sweeter and more concentrated they become. Depending on what you are making, you can decide how sweet and concentrated the onions should be. This gradual heating of onions has powerful implications on the finished dish.
Carrying this process of sweating one step further, by increasing the heat and slowly browning the onions, called caramelizing, a culinary phenomenon that occurs when sugars trapped in the onions are heated, causing them to turn golden brown. Onions can’t properly caramelize until the moisture first cooks off, and for this reason, it takes a little time and patience. Heat them too hot or too fast, and they will scorch. Caramelized onions, considered by many as an onion’s highest achievement, are utterly tender and sweet, yet also savory, deep and nutty – full of incredible umami flavor.
Take these caramelized onions and elevate your next burger, or put them in a grilled quesadilla, or try them in a French Onion Grilled Cheese Sandwich. Swoon.
The easiest way to caramelize onions is to use your biggest heavy-bottom skillet, set a burner to medium-low heat, and let the pungent alliums cook long and slow in a little oil or butter. Stir every once in a while, but feel free to leave them and attend to other things.
At this temperature, the moisture releases and the sugars caramelize steadily, never burning but growing ever more golden and delicious. At the end, add a pinch of salt and pepper, and perhaps, a splash of port, sherry or beef stock if you like, letting it cook off. This is the essence of French onion soup.
Other exciting alliums are available this time of year. Sweet onions have arrived, with their mild, less harsh flavor. Grown in soil containing less sulfur, these onions produce fewer tears. Unlike storage onions, sweet onions are fresh, picked and cured for a short period of time, containing much more water, which dilutes the sulfur content and makes for a crunchy, crispy, mild and sweet-tasting onion. For this reason, these are wonderful eaten raw, thinly sliced and tossed in salads, layered in sandwiches, chopped up in salsas or fresh relishes, or just slightly grilled. Some go so far as to eat them like an apple. Once you cook them, they behave like regular storage onions, so in my mind, it makes less sense to cook these sweet guys.
A new favorite allium to arrive at the farmers market is green garlic, which looks much like scallions, or spring onions, but are actually garlic that haven’t fully matured, along with their leaves. Locally, Urban Eden and Tolstoy farms both offer green garlic, pulled from the ground before the garlic cloves develop and separate.
“Use the leaves like you would scallions: scrambled in your eggs, tossed in a salad or minced in a vinaigrette for a mild garlic kick,” said Tarawyn Waters of Urban Eden Farms. “And the young bulbs can be used as you would use regular garlic cloves.”
Green garlic often looks so similar to green onions that you’ll have to do a double-take. The best way to be sure you’re getting green garlic is to take a whiff. It should smell pleasantly of garlic rather than onion, with flat leaves rather than tubular.
Shallots and leeks, other members of the allium family, generally don’t show up at local farmers markets until later in the growing season, summer through late fall, but their importance should not be overlooked. Shallots concentrate the best attributes of an onion without being overly harsh, offering more bang for your buck, so to speak. When raw, tame them by macerating them with a little acid, like lemon juice or vinegar, to create extraordinary vinaigrettes. Caramelized, they are even more intense and sweet than onions. Roasted whole, glazed with wine or port, they a make a tender, delicious, savory side to meats. If there is one allium to master, it is the shallot. Do so, and they will elevate your cooking.
Leeks delicately but distinctly add a lovely onion flavor to dishes without overpowering them. Lately, I’ve taken to simply grilling them. Slice them in half lengthwise, brush with olive oil, and char them up a bit. Place in a pan and seal with foil and let them steam for a few minutes to soften.
In contrast, their sharp-flavored wild cousins, sometimes referred to as ramps, or wild leeks, are early spring alliums, grown in the wild at higher elevations, and are usually foraged. Their potent flavor is a combination of both onion and garlic, and they lend themselves well to pasta, eggs, potatoes and wild mushrooms. Their rarity has created an almost cult-like following in the food world.
Another up-and-coming allium to briefly make a showing at the farmers market is garlic scapes: the twisty, curly, bright green flower stalks of garlic plants, appearing a month or so after the first leaves. They are usually cut off the garlic plant to help divert more of the plants energy toward the bulb. Use these intensely flavored stocks any way you would garlic: in pesto, hummus or pickled.
The smallest and hands-down cutest of the edible alliums are garlic and onion chives. While storage onions work hard to create the base and foundation of a dish, I think of chives and their blossoms like allium fairy dust – sprinkled on at the end of cooking, to finish a dish, adding a delicate magical layer of flavor along with pretty specks of color.
Growing alliums at home is doubly rewarding. Not only do we receive all the benefits of using them to flavor and nourish what we eat, they grace us with their beauty and form. Alliums are in the lily family, visually stunning with their perfectly symmetrical, single, globe-shaped flowers, made up of zillions of tinier flowers, worlds within worlds, in shades of pinks and purples and whites. I never tire of looking at them.
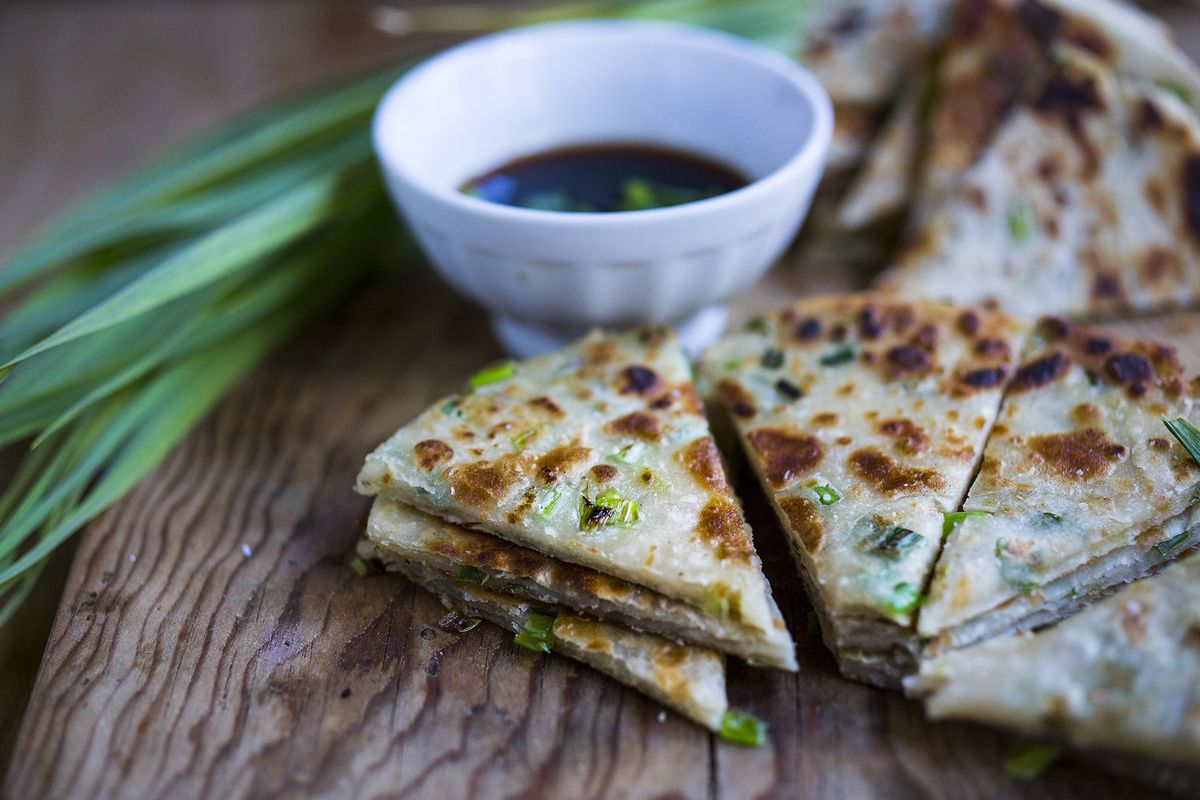
Green Garlic Pancakes
2 cups all-purpose flour, plus extra for dusting work surface
1 cup boiling water
1/4 cup toasted sesame seed oil
1/2 cups finely chopped green garlic leaves
Kosher salt
For dipping sauce
2 tablespoons soy sauce
2 tablespoons rice wine vinegar
1 tablespoon finely sliced scallion greens
2 teaspoons sugar
For frying
1/4 cup vegetable or peanut oil
Place flour in food processor. With processor running, slowly drizzle in about 3/4 cup boiling water. Process for 15 seconds. If dough does not come together and form a ball, pour in more water a tablespoon at a time, just until it comes together into a ball. Transfer to a floured work surface and knead a few times to form a smooth ball. Transfer to a bowl, cover with a damp towel or plastic wrap, and allow to rest for 30 minutes at room temperature. After it has rested, cut the dough into 4 equal pieces and roll each into a smooth ball.
Working one ball at a time, roll out into a disk roughly 8 inches in diameter on a lightly floured surface. Using a pastry brush, paint a very thin layer of sesame oil over the top of the disk. Roll disk up like a jelly roll, then twist the roll into a tight spiral, tucking the end underneath. Flatten gently with your hand, then re-roll into an 8-inch disk. Paint with another layer of sesame oil, sprinkle with a fourth of the green garlic and a generous sprinkling of salt. Roll up like a jelly roll again. Twist into a spiral, flatten gently, and re-roll into a 7-inch disk. Repeat with remaining pancakes and set aside.
Combine all the dipping sauce ingredients in a small bowl and set aside at room temperature. Heat 1 tablespoon oil in an large cast-iron or nonstick pan over medium-high heat until shimmering. Carefully slip pancake into the hot oil. Cook, shaking the pan gently until first side is an even golden brown, about 2 minutes. Carefully flip with a spatula or tongs (careful not to splash the oil), and continue to cook, shaking pan gently, until second side is an even, golden brown, about 2 minutes longer. Transfer to a paper towel-lined plate to drain. Cut into 6 wedges. Serve immediately with sauce for dipping. Repeat with remaining 3 pancakes.
French Onion Grilled Cheese Sandwich
1 large red or yellow onion, thinly sliced about 1/8 inch thick
1 tablespoon oil
Pinch salt
Pinch freshly cracked pepper
1/4 cup sherry, port or beef stock (optional)
4 slices French bread
2 tablespoons butter
1 cup grated Gruyère cheese
1 teaspoon fresh thyme (optional)
In a large heavy bottom skillet, or cast-iron pan, heat oil on medium heat. Add onion and sauté for 5 minutes, stirring to coat. Turn heat down to medium low. Stir occasionally and continue sautéing for 30 minutes. Onions will sweat out their moisture, and eventually caramelize into a golden brown. Add a generous pinch of salt, a splash of port (optional) and let the liquid cook off. Remove from pan and wipe it out with a paper towel, to use again. Spread each slice of French bread with softened butter. On two slices, layer shredded Gruyère, top with caramelized onions, sprinkle with fresh thyme leaves, then add the rest of the cheese. “Close” the sandwiches with the other slices of bread, and gently press together. Heat butter (or a combination of butter and oil) in the same skillet over medium heat. Place sandwiches in the pan and toast, carefully flipping when golden brown and cheese begins to melt. Place in a warm oven to melt the cheese if necessary, which will prevent the bread from getting too dark. Cut in half and enjoy.
Chive Blossom Potato Salad
1 1/2 pounds small baby potatoes or fingerling potatoes (ideally those tiny potatoes that are no more than 1 1/2 inches in diameter)
Salt
1/4 cup chopped Italian parsley
1 tablespoon capers
1/4 cup chopped chives and blossoms (broken apart)
For the dressing
1/4 cup olive oil
1 1/2 tablespoon sherry vinegar, red wine or white wine vinegar
1 clove garlic, finely minced
1/2 teaspoon salt
1 teaspoon Dijon mustard
Freshly cracked pepper
Boil potatoes in salted water until fork tender, about 15 minutes. Drain. Place them in a bowl with parsley, capers and chives. In a separate bowl, whisk dressing together and combine with the potatoes. Serve warm or chilled. Garnish with more chive blossoms.
Grilled Naan with Garlic Scape Chutney
For the dough:
5 1/4 cups unbleached all-purpose flour; more as needed (optional: substitute 1 cup whole wheat)
4 teaspoon baking powder
1 tablespoon kosher salt
1 teaspoon sugar
1/2 cup plain yogurt
1 large egg
1/4 cup olive oil and more for brushing.
1 1/2 cup water
For the chutney:
3/4 cup chopped garlic scapes, tops removed (or sub Italian parsley or cilantro packed with 2 cloves garlic)
1/2 cup fresh mint packed
1/2 cup roasted or smoked almonds
1/2 teaspoon kosher salt
1/2 teaspoon black pepper
1/2 jalapeño or Serrano pepper, for a little kick (optional)
1 tablespoon lime juice
1/3 cup olive oil, plus more for brushing (or melted butter for brushing)
1 cup melty cheese, such as mozzarella, queso fresco or paneer
Make the dough: Combine flour, baking powder, salt and sugar in the bowl of a stand mixer fitted with the dough hook. In a medium bowl, whisk the yogurt, egg and add 1 1/2 cups of lukewarm water and the oil. Pour the yogurt mixture into the flour mixture and mix on low speed until a soft, sticky dough starts to clump around the hook, about 5 minutes. If the dough seems too wet, add more flour, 1 teaspoon at a time. Line a baking sheet with parchment and dust lightly with flour. Turn the dough out onto a lightly floured surface and divide it into 10 equal pieces. Form each piece into a ball and arrange them on the baking sheet. Lightly brush the dough with oil, cover with plastic, and let sit 1 hour before shaping.
Make the chutney: Place the chutney ingredients, through 1/3 cup olive oil, in a food processor and pulse until uniformly granular.
On a lightly floured surface, roll a dough ball into a 5-inch circle. Spread 1 tablespoon of the chutney in the center, leaving a 1/2-inch border. Sprinkle 1 tablespoon of cheese over the chutney. Gather the border to form a pouch, pinching it to seal in the filling. Turn the pouch pinched side down and, using very light pressure, roll it into a 6-inch circle. Transfer to a parchment-lined baking sheet. Layer rolled-out naan with parchment until ready to grill. Prepare a medium charcoal or gas grill fire and wipe grates with a lightly oiled paper towel. Grill the breads in batches, pinched side down, covered, until they puff up and the undersides brown lightly in places, 2 to 3 minutes. Turn over and cook the other side, covered, until grill marks form and the breads are cooked through, 2 to 3 minutes. Just before taking them off the grill, turn the breads pinched side down and brush lightly with butter or olive oil. Serve warm. These are best right off the grill, but leftovers can be refrigerated and saved for another time. Just place them in a toaster or warm oven before serving.
The Seasonal Kitchen is a monthly feature. Local chef Sylvia Fountaine writes about seasonal foods she’s making in her kitchen, sharing recipes and a passion for local foods. Fountaine is a caterer and former co-owner of Mizuna restaurant. She writes about home cooking on her blog, Feasting at Home, www.feasting athome.com/.